
You want steady, great kombucha—but the wrong Schiff ruins flavor.Cloudy jars, stuck spigot, off-notes… weeks wasted.Pick a brew vessel that fits your volume, material, and workflow so you can Kombucha brauen confidently—every time.
The best kombucha brewing vessel balances safe material (glass or food-grade stainless), right size (from 1 Gallone to small pilot tanks), and practical features (cloth cover, spigot, easy sanitation). Choose continuous brew for steady output; choose batch brew for simpler starts. Match the kombucha brew vessel to your process, then scale as your demand grows.
1) What size brew vessel do I need for kombucha at home?
If you’re new to kombucha at home, start with a gallon jar (also written 1-gallon) so you can learn the Fermentationsprozess without risking a lot of kombucha. This size keeps heat stable, makes it easy to watch kombucha in the vessel, and gives predictable timelines of 1-2 weeks. As your confidence grows, you can scale to 4 gallons or modular tanks.
If you expect to brew weekly for a family, batches of kombucha around one gallon per brew cycle work well. Want an upgrade path and reliable fittings? Explore a compact small batch brew system that’s built to scale and easy to clean—see the small-batch system options for pilots and home homebrewers (helpful if you plan to add a kegging or canning step later).

2) Is glass, stainless, or ceramic the best kombucha brewing vessel material?
Glass jar: Great visibility, neutral, and easy to sanitize. Choose thick, food-safe American glass if possible, and pair with a breathable cloth and rubber band.
Stainless: Food-grade stainless tanks resist impact and hold temps well; they’re strong when moving the gallon vessel and can be custom made with ports for samples or a sight glass.
Keramik: Use only lead-free, food-safe glazes. Visibility is limited, so be strict about cleaning.
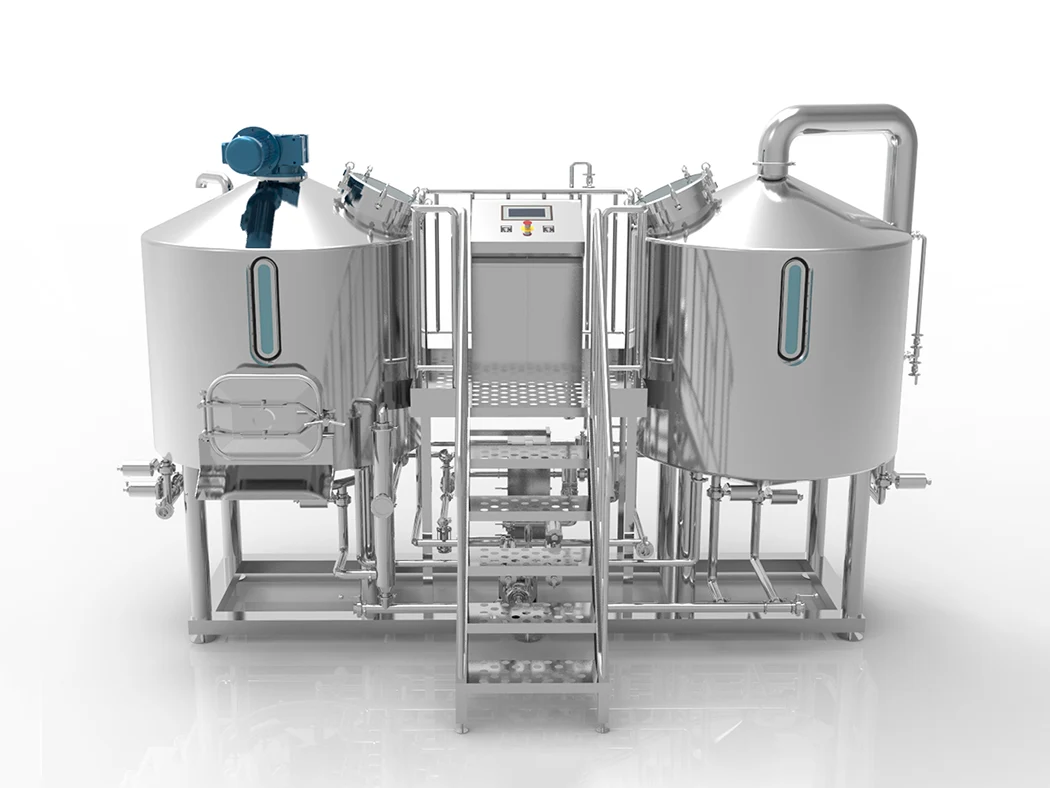
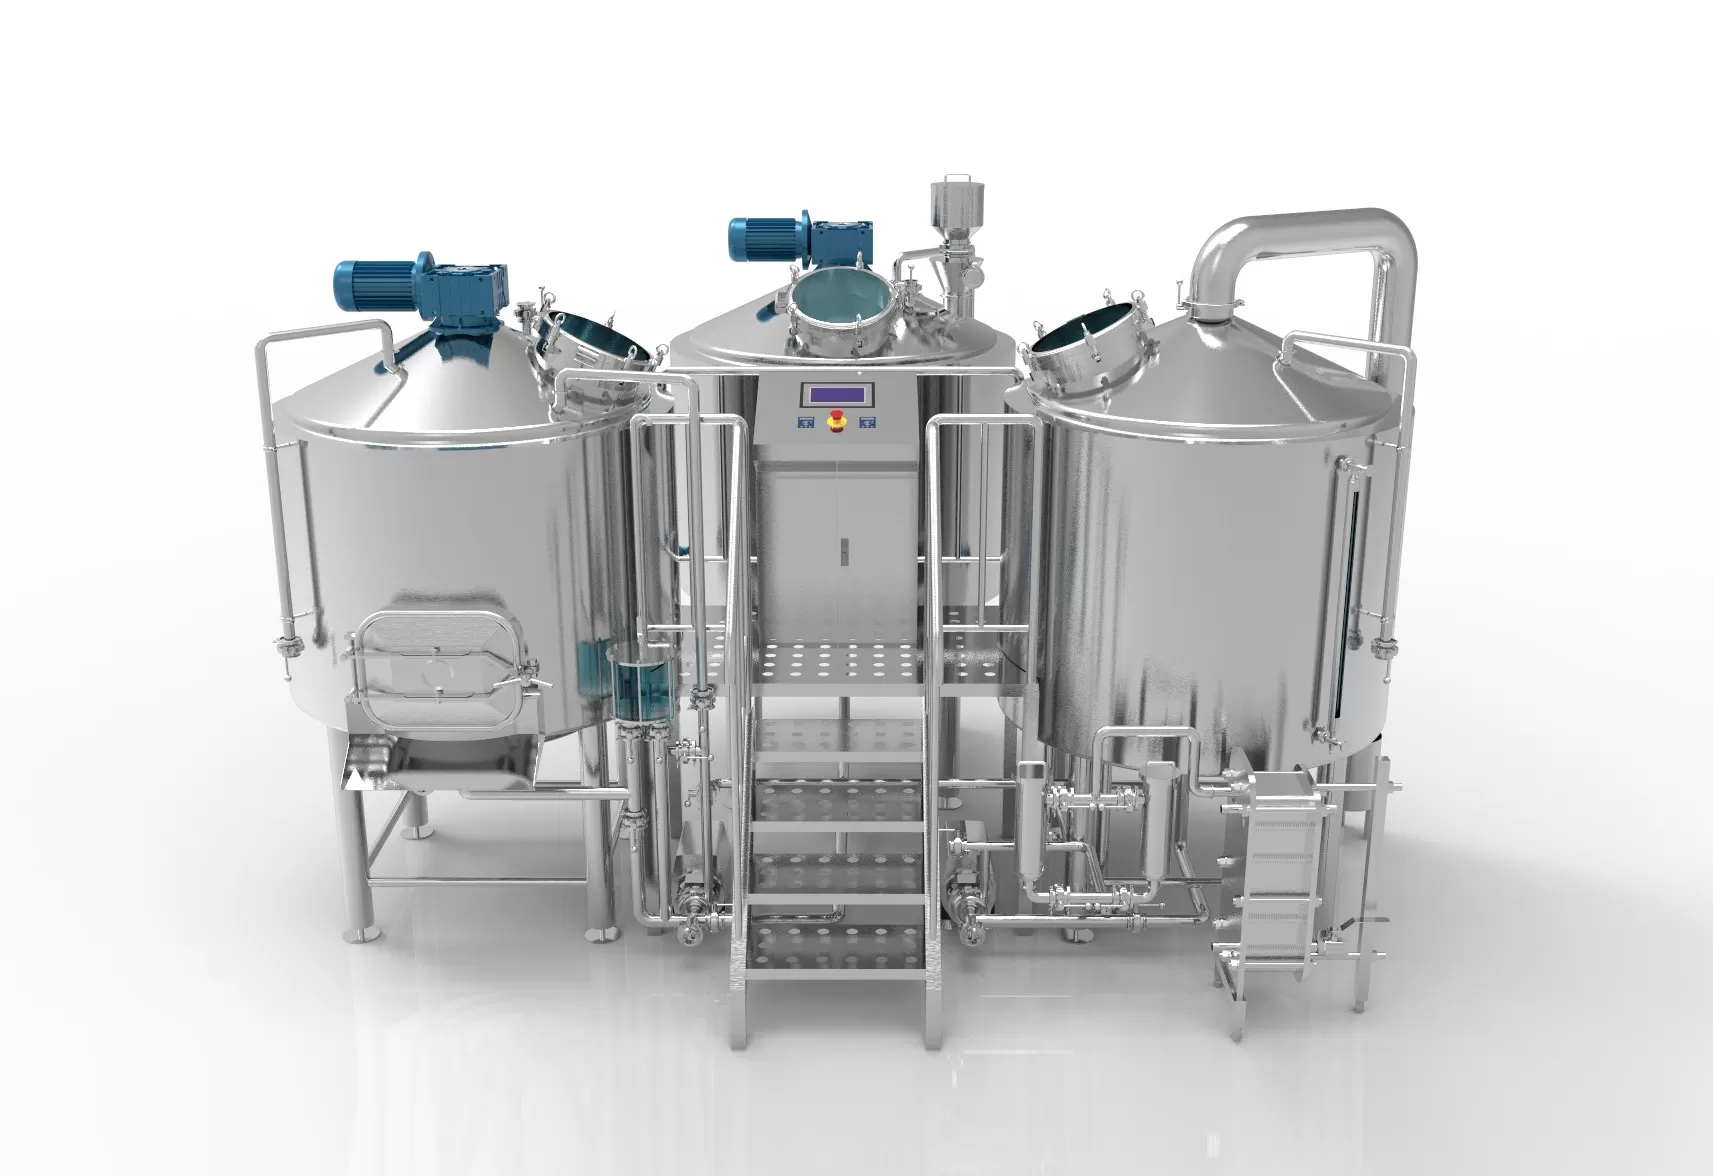
For most beginners, glass is simple and forgiving. As you scale, a Fermenter aus rostfreiem Stahl helps control conditions and service ports while keeping oxygen exposure low. If you need an upgrade path or professional fittings (thermowell, racking arm), see these kombucha brewing packages and tank configurations.
Material quick-compare
| Material | Profis | Watch-outs |
| Glas | Visible ferment, neutral, low cost | Break risk, thermal shock |
| Stainless | Durable, ports, precision control | Höhere Vorabkosten |
| Keramik | Aesthetic, stable temps | Must be fully food-safe glaze |
3) Continuous brew vs batch brew: which brew system suits you?
Batch brew is simple and ideal for individual batches. You make sweet tea, cool it, add starter tea, then fermentieren to taste. On bottling day, you rack to bottles, clean up, and plan the next batch. It’s an easy way to get started brewing and dial in flavors.
Continuous brew keeps the mother scoby in the tank while you draw finished kombucha tea von der spigot Und add fresh sweet tea on schedule. It offers steadier production, faster turnaround, and stable acidity. For consistent café service or tap programs, continuous brew kombucha may be the most efficient path.
Profi-Tipp: If you brew kombucha and want fewer interruptions and smoother scheduling, go continuous; if you love experiments and seasonal flavoring, keep doing batch.
4) Does a spigot matter on a kombucha jar for bottling day?
Yes. A bottom spigot (ideally high-flow and sanitary) saves time and reduces oxygen pickup. It lets you rack clear kombucha while leaving the sediment behind. Always sanitize before you use the spigot and again after you finish. For speed, pair the spout with a bottling wand and capper for neat bottles of kombucha.
When you grow beyond the typical kombucha brewing jar, you’ll appreciate tri-clamp fittings on pro tanks, which let you add sample valves, carb stones, or filtration skid lines. If packaging is on your roadmap, review monoblock fillers and seamers.
5) How to set up your jar, cloth, rubber band, and starter tea
Für making kombucha safely, clean your jar, rinse well, and avoid soap residue. Cover with a tight-weave cloth and a rubber band—you want airflow, but no fruit flies. Heat-shock resistant kombucha containers or brewing containers prevent cracks when hot liquid meets glass.
Add the right amount of starter tea (usually 10–20% by volume) and a healthy scoby. That balance helps the yeast and bacteria start fast and suppresses invaders. For steady production, maintain a reserve so you can Kombucha brauen again without delays.
6) Fermentation process: time, temperature, and pH you should track
Most rooms yield a pleasant fermentieren between 24–30 °C (75–86 °F). Track with a stick-on thermometer on the vessel wall or a thermowell probe. Warmer speeds up souring; cooler slows it down. Taste daily after day 5. You should be able to drink kombucha once tart and lightly effervescent.
Simple timeline you can adapt
| Day | What to check | Typical cue |
| 0 | Starter tea, scoby, cover secure | Sweet but tea-forward |
| 3–5 | First acidity shift | Less sweet, faint tang |
| 6–10 | Target window | Crisp acid, balanced tea |
| 10+ | For vinegar styles | Strong acid, cook-down uses |
If you’re planning on kegs or a café tap, a professional brew system with glycol jackets and sanitary fittings tightens control so your kombucha is identical every week.

7) Sanitation, flavoring, and safe bottling
Cleanliness wins. Rinse well, sanitize cold-side gear, and keep your workspace tidy. Healthy bacteria and yeast (your scoby Und scobys) keep the culture robust, but sanitation prevents wild microbes and off-flavors. Add flavoring during bottling to keep the primary fermentieren clean.
On bottling day, prime bottles carefully and aim for a stable, repeatable routine. If you’re ramping output, choose sanitary hoses and quick-connects and plan for a small CIP cart. That makes it easier to maintain quality whether you package gallon kombucha batches or larger.
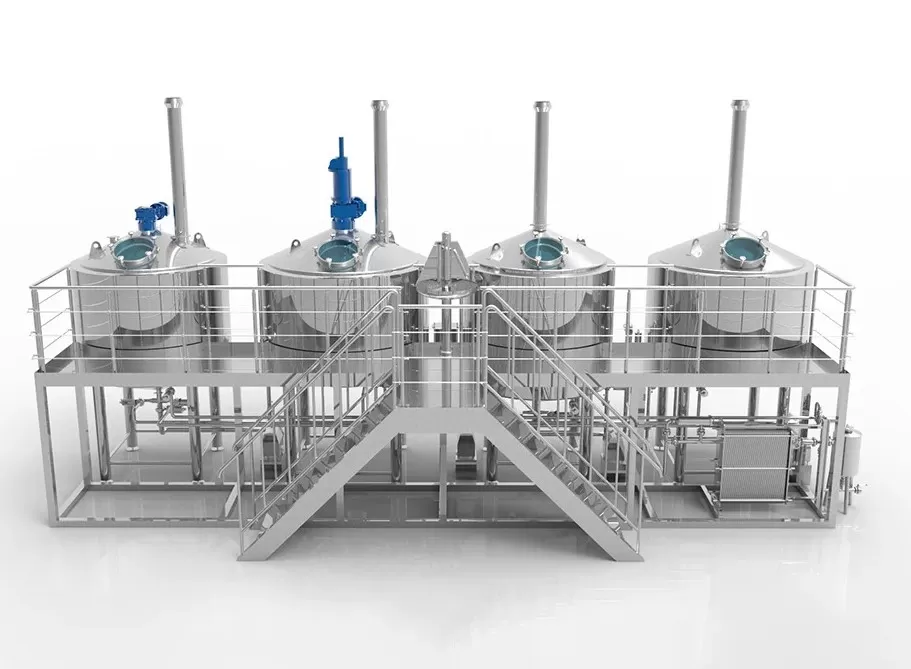
8) Scaling up: from 1 gallon to 4 gallons and beyond (controls, fittings, workflow)
When production grows past 1 Gallone kitchen runs, think workflow: floor drains, carts, and purpose-built stands. Food-grade tanks with racking arms protect clarity; a sample valve reduces oxygen exposure. If you ever add hop-style tea infusions or in-line filtration, tri-clamp ports make life easier.
Choose a skid with pumps and heat exchange to handle hot sweet tea, cold crash, and transfers. That means fewer lifts and faster turns. For beverage entrepreneurs who branch into cold-brew coffee, kefir, or even light Destillieren, plan ahead with multi-product cellars.
9) A practical, step-by-step setup for brewing kombucha at home
Gear checklist (starter level, one time buy):
- Heat-resistant kombucha brewing jar(thick glass) + cloth + rubber band
- Food-safe spigot(or siphon) and long-neck bottles
- Calibrated thermometer(stick-on or probe)
- pH strips or meter, cleaning brush, drying rack
Your first run (simple, repeatable):
- Brew tea and dissolve sugar; cool it; brew notes: record grams, pH, room temp.
- Add starter teaUnd scoby; cover the jar; set on a stable shelf.
- Taste daily until you like it; then bottle, chill, and enjoy.
When you’re ready to scale production or go semi-pro, replicate the same logic using jacketed tanks, sanitary fittings, and a defined SOP.
10) Case study: A brewpub launches a steady, simple kombucha program
A neighborhood brewpub wanted café-style service without overworking staff. They started with batch brew vessels at home-scale to fine-tune flavor, then moved to a 100 L jacketed tank with a tri-clamp spigot. They scheduled pulls twice weekly, kept a reserve starter tea, and repeated the same brew cycle to keep “house kombucha” on tap.
Results after 90 days: waste down 30%, service time per pour down 40%, and steady demand. When flavor rotation began (ginger-lime, rose), they standardized flavoring recipes and moved packaging to a small counter-pressure filler set.

Quick glossary so we speak the same language
- Kombucha brewing vessels and containers: This guide compares kombucha brewing vessels and containersso you can choose a favorite vessel and scale smoothly.
- Kombucha brewing vessel: Any food-safe tank or jarused for tea ferments—glass or stainless—with a cloth cover or sealed lid for secondary.
- Bierbrauer: The person (you!) who plans volumes, timelines, and quality.
- Brewing kombucha at home: A simple, low-cost way to validate recipes before you commit to café volumes.
- Kombucha making / making kombucha: The craft of turning sweet teainto a tart, bright drink through a living culture.
- Kombucha containers / kombucha jars: Packaging and ferment containersfor primary and secondary.
- Kombucha and want: If you brew kombucha and wantfewer chores, consider a continuous setup.
Safety and culture health in one minute
Die scoby is a symbiotic colony of bacteria and yeast. Keep it healthy with clean gear and balanced nutrients. If you ever see fuzzy growth or odd colors, discard and restart. Remember: yeast and bacteria proportions shift with temperature, sugar, and teas, so keep good notes and adjust gently.
“Tidy space, consistent inputs, and small changes.”
That simple rule protects quality better than any fancy gadget.
Common setups and who they’re for
Table: who should use what?
| Benutzer | Primary vessel | Why it fits |
| First-time brewer | Thick glass, jar with cloth | See the fermentieren, low cost |
| Busy café | Ummantelt Schiff mit spigot | Faster pulls, stable output |
| R&D team | Small pro tank, sampling ports | Tight control, repeatable runs |
When your brewing needs grow from hobby to storefront, consider factory-built tanks with sanitary welds and jackets. They’re safer to move when hot and easier to clean—especially after sticky tea infusions.
“Set-and-flow” continuous brew, step by step (simple SOP)
- Charge the tankmit sweet tea, correct amount of starter tea, and the culture.
- Let it fermentierenuntil target acid and aroma.
- Pull a portion via spigotfor service; add fresh sweet tea to refill and keep the culture happy.
- Rotate scobysonly when needed; don’t shock the system.
This is the most forgiving way to serve kombucha every week with minimal downtime. If you plan to split lines (plain vs ginger), a small bright tank helps conditioning without clogging taps.
Troubleshooting quick hits (tips and tricks)
- Too sweet after 10 days? Warmer room, or larger culture.
- Thin pellicle? Check nutrients; try black or oolong tea.
- Vinegar fast? Cool it down, drop the pull percentage.
If you ever produce a lot of kombucha and need rapid chilling before delivery, consider a small glycol chiller and jacketed tank. It reduces oxidation and keeps CO₂ predictable.
Final checklist before you scale
- Do you want continuous brewoder batch brew?
- Are your fittings sanitary and easy to clean?
- Do you have space for cases and drains?
- Is your packaging path sized for your taproom sales?
If you’re ready to expand beyond gallon kombucha runs, we can supply tanks, fittings, and layouts that fit your space and budget—and yes, we can build custom made ports for sampling, CIP, or in-line filtration.
Mini FAQ
What’s the simplest starting setup?
A thick glass jar, breathable cloth + rubber band, starter tea, a healthy scoby, and a stick-on thermometer. That’s enough to get started brewing and build confidence.
How long should I ferment before bottling?
Most kitchens land between 1-2 weeks. Taste daily. When the balance feels right, move to bottles, add flavoring if you like, and chill.
Is ceramic safe for kombucha?
Only if it’s truly food-safe glaze. If unsure, choose glass or stainless to be safe.
What is “jun”?
Jun is similar to kombucha but typically uses green tea and honey in place of black tea and sugar. Manage it like kombucha and monitor acidity closely.
Can I scale from a jar to tanks?
Yes. Start with a glass jar, then step into jacketed tanks as demand grows. We can align the same SOP from pilot to production to keep flavor consistent.
Key takeaways
- Choose safe material (glass or food-grade steel) and size for your schedule.
- Decide early: continuous brewfor flow, batch brew for simplicity.
- Add tested fittings (spigot, thermowell) and define a cleaning SOP.
- Keep records to protect flavor and shorten troubleshooting.
- Scale with jacketed tanks, sanitary tri-clamps, and right-sized packaging.
We’re a Brewing Equipment Manufacturing plant supporting startups, brewpubs, and beverage entrepreneurs with turnkey gear and global service. When you’re ready to size a tank or map a line, we’ll help you match capacity to demand and move from test runs to reliable daily service.