
As people pay increasing attention to dietary health and quality of life, home brewing has evolved from a niche hobby to an increasingly popular way for more families to pursue natural and pure drinks. Whether it is beer, kombucha, fruit wine, honey wine, or fermented plant drinks, home brewing not only brings a sense of accomplishment but also allows people to have a deep understanding of the secrets of fermentation science and natural food.
Under this trend, home brewing equipment with a capacity of 100L has become an ideal choice for many brewing enthusiasts and small home workshops because of its moderate output, strong flexibility, and high cost performance. This guide will give a comprehensive introduction to 100L home brewing equipment to help you better understand and use brewing equipment.
Why choose 100L capacity?
- Moderate output: Compared with small 20L and 30L equipment, the capacity of 100 liters has higher output efficiency, which is suitable for multiple people in the family to drink or periodic large-scale brewing. And it does not put pressure on space, electricity, and operation like 200L and 500L, which is very suitable for users with limited space and who want stable brewing.
- Strong flexibility: 100L capacity can be used for traditional beverages such as home-brewed beer, wine, plum wine, and also for healthy beverages such as kombucha, enzymes, turmeric drinks, low-alcohol beverages, etc. One device has multiple uses and has strong scalability and experimental value.
- Balance of cost and benefit: Equipment of this capacity level is generally made of food-grade stainless steel, which not only ensures safety and hygiene but also relatively controls manufacturing costs. For brewing users with a budget of less than 10,000 yuan, it is a cost-effective solution.

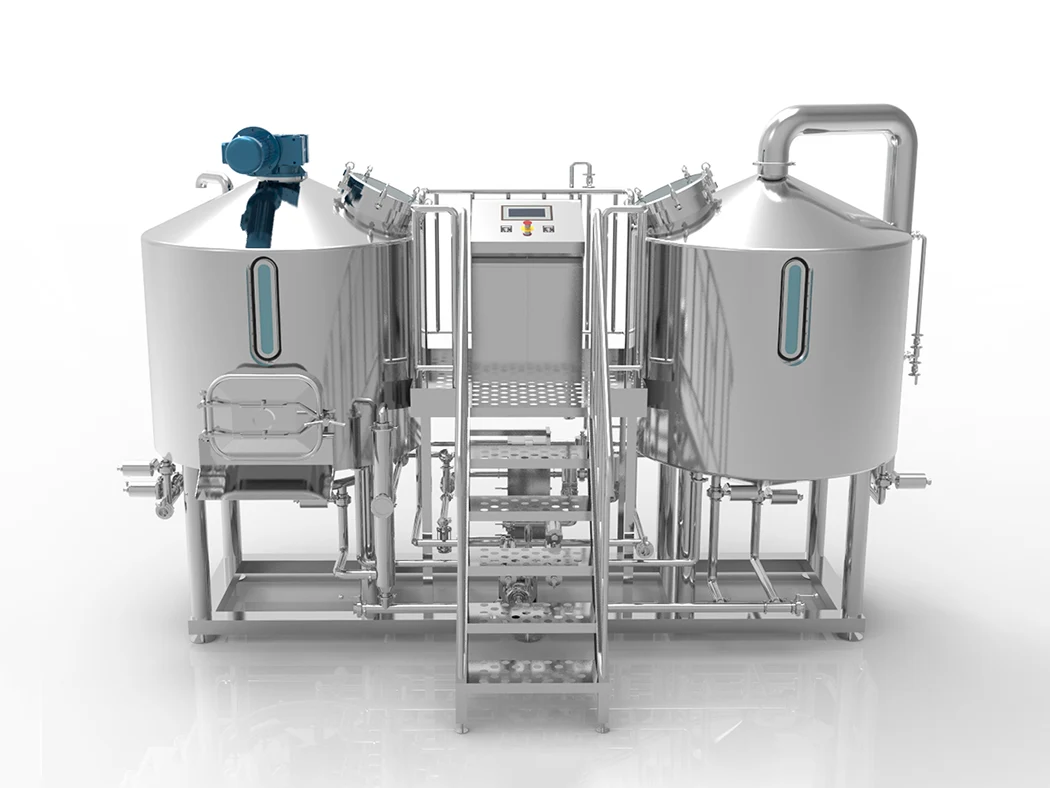
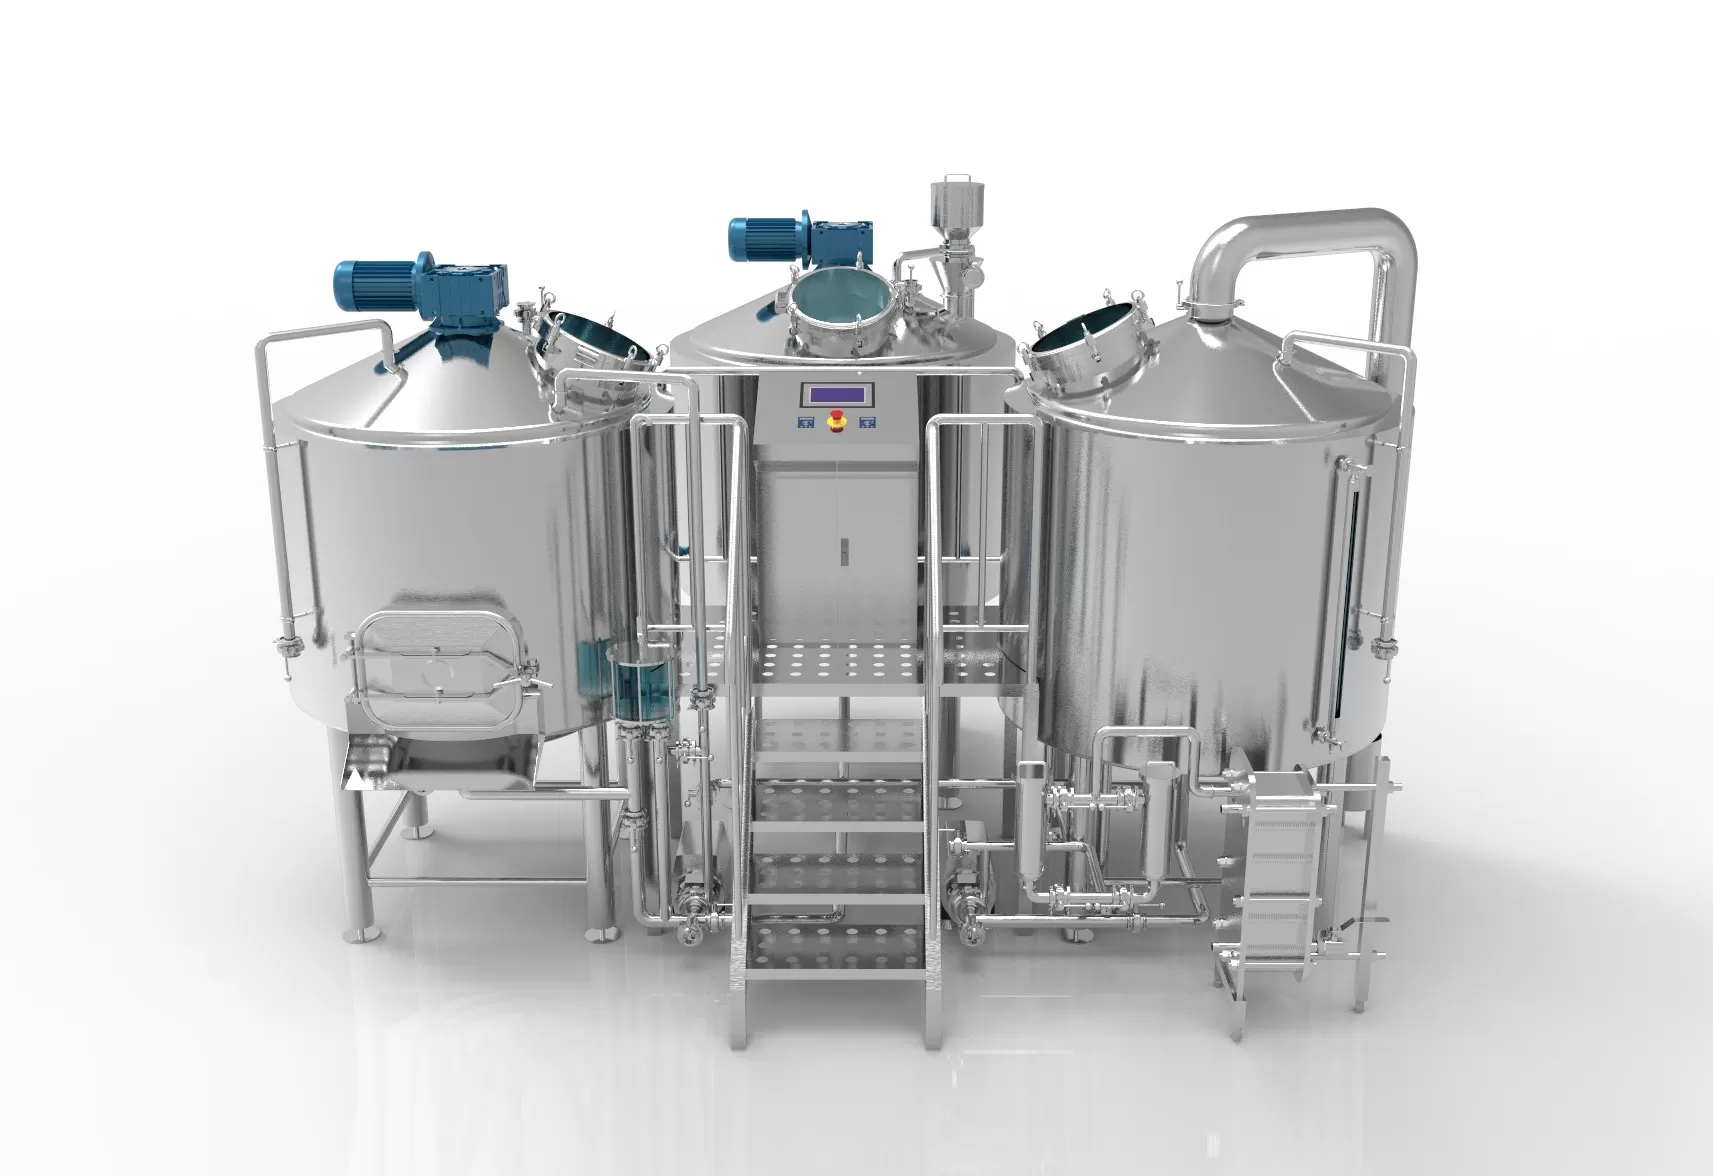
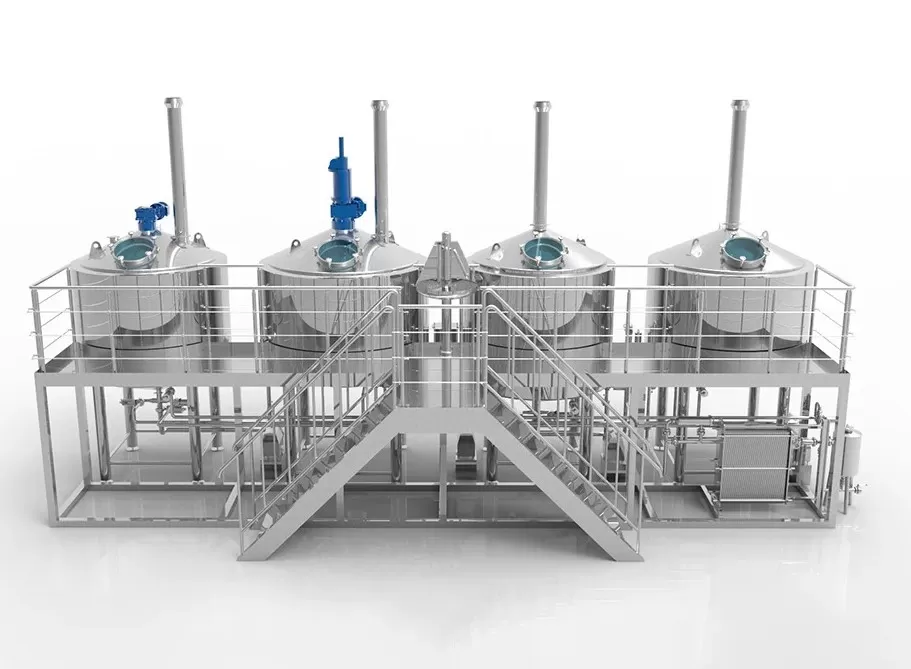
Main components of 100L home brewing equipment
Gistingstank
- Material: Food-grade SUS 304 stainless steel, acid and alkali resistant, corrosion resistant, and the surface is mostly mirror or matte polished.
- Structure: Closed cylindrical structure with an openable lid or manhole, and a conical or round bottom for easy slag discharge.
- Capacity control: Maximum capacity is 100L, and it is recommended that the working capacity be controlled at 80~90L to leave room for fermentation expansion.
- Sealing: Equipped with a silicone sealing ring, a breathing valve, or an air lock to avoid contamination by bacteria.
Temperatuurregeling
- Configuration: Digital temperature controller + heating rod/heating belt + cooling coil or refrigeration compression system.
- Function: Adjust and maintain the required temperature for fermentation to ensure stable microbial activity.
- Application: Suitable for low-temperature fermentation in beer brewing, constant temperature fermentation in kombucha, etc.
Stirring system (optional)
- Electric stirrer: used for beverages that need to be mixed evenly or react continuously, such as enzymes, plant vinegar, etc.
- Magnetic stirring: suitable for experimental applications, no dead angle, low noise.
Liquid outlet system
- Bottom drain port: with ball valve, convenient for clearing liquid or pouring wine.
- Liquid level meter/observation window: real-time monitoring of liquid level to prevent misoperation.
CIP cleaning device (optional)
- Function: built-in rotating spray ball or mobile cleaning ball, can be connected to hot water or alkaline water for efficient cleaning.
- Advantage: improve hygiene standards and extend equipment life.
Bedieningspaneel
- Configuration: LED temperature display, timing function, start/stop control button.
- Intelligent: high-end models support APP remote control or cloud fermentation data management.
Common Applications
Homebrewed Beer (Ale, Lager)
- Capable of mashing, boiling, cooling, and primary fermentation;
- Requires high temperature control precision;
- It is recommended to equip with a cooling coil or ice water circulation system.
Kombucha, Enzymes, Fermented Fruit & Floral Beverages
- Requires stable medium temperature (25–30°C), thus a temperature control system is essential;
- A glass observation window or transparent sight glass is recommended for monitoring the condition of SCOBY and foam;
- Regular cleaning and sediment discharge are necessary.
Fruit Wine / Rice Wine / Mead
- Long fermentation cycle (1–3 weeks);
- High requirements for hygiene and airtightness;
- It is recommended to add a pressure valve and activated carbon exhaust tube to prevent odors and bursting.
High-End Seasoning Sauces, Plant-Based Vinegar, and Other Fermented Products
- Involves continuous fermentation and feeding;
- Recommended to include a stirring device and multi-functional discharge system;
- Suitable for home workshops or creative beverage startups with a certain R&D foundation.
100L Home Brewing Equipment: Selection Tips & Comparative Analysis
Check Material Thickness and Workmanship
When choosing a 100L home brewing system, the material and craftsmanship are key to ensuring quality and service life. The main body is usually made of food-grade 304 stainless steel, which is corrosion-resistant, acid- and alkali-resistant, and effectively prevents secondary contamination, ensuring hygienic fermentation.
Choose tanks with a wall thickness of no less than 1.5mm. The bottom should be thickened for better structural strength, preventing deformation and uneven heat transfer.
High-quality welding is also crucial—seams should be smooth and burr-free, with no cracks, to avoid dirt buildup and ensure easy cleaning and maintenance. The inner design should be free of dead corners to prevent residue accumulation and to maximize sanitation.
Evaluate Temperature Control Performance
Precise temperature control directly affects microbial activity and product quality during fermentation. High-end 100L systems typically include a PID intelligent temperature controller, which adjusts heating/cooling power in real-time to maintain stable temperatures.
Such systems allow flexible temperature setting to meet different beverage fermentation needs (e.g., low-temperature lagering or warm kombucha fermentation). Advanced equipment may also feature multi-point temperature probes and overheat protection to ensure safety and prevent damage.
Functionality & Expandability
The practicality of a 100L system depends greatly on its functions and expandability. A multifunctional, modular design supports a wider range of brewing needs.Some models can connect to external cooling systems for more precise low-temperature fermentation.Agitation systems are ideal for beverages that require continuous mixing (e.g., enzyme drinks or plant-based vinegar).Automatic filling and drainage reduce manual labor and improve efficiency.Advanced units may even support remote monitoring and smart management via mobile apps—letting users monitor fermentation status, adjust temperature, and control timing remotely.Check if the system has reserved ports for future upgrades—this affects long-term value and service life.
After-Sales Service & Brand Reliability
Strong after-sales support and reputable brands are essential for long-term stable use.Choose manufacturers with a proven industry reputation and engineering experience. These suppliers typically offer higher product quality and better service, including at least a one-year warranty, technical support, repair services, and quick-response customer care.Top-tier manufacturers often offer customization services to tailor the equipment to specific brewing needs.Opting for a trusted brand with strong after-sales support minimizes risks and ensures peace of mind.
100L Home Brewing Equipment: Operational Workflow (Beer Brewing Example)
Equipment Preparation: Cleaning & Sanitization
Before brewing, thoroughly clean and sanitize the entire 100L system.Use warm water and food-grade detergent to clean the tank, pipelines, valves, and lids. Rinse with hot water to remove detergent residue.Finally, disinfect with iodine solution or alcohol to eliminate microorganisms and prevent contamination during fermentation.
Bereiding van ingrediënten
Prepare malt extract according to the recipe.Mash the malt in the mash tun at about 65°C for 60 minutes to convert starches into fermentable sugars.After mashing, filter out the wort and remove solid residue.Boil the wort and add hops for bitterness and aroma—typically a 60–90-minute boil.Cool the wort quickly to the appropriate fermentation temperature (typically 18–22°C, depending on yeast strain).

Filling the Fermentation Tank
Transfer the cooled wort into the 100L fermentatietank, leaving about 10% headspace to prevent overflow.Seal the lid tightly and install an airlock to allow CO₂ to escape while keeping contaminants out.
Yeast Inoculation
Prepare the yeast culture based on the recipe and evenly mix it into the wort.Activate the temperature control system to maintain the optimal fermentation range and ensure yeast viability.
Monitoring Fermentation
In the early stage, foam and bubbles will appear on the surface. Bubbling in the airlock indicates active fermentation.Maintain a clean environment and avoid opening the lid frequently.Use built-in temperature display and sight glass to monitor conditions.Fermentation typically lasts 7–14 days depending on the yeast and recipe.
Secondary Fermentation & Clarification (Optional)
After primary fermentation, transfer the beer to a secondary tank to help clarify the brew and improve flavor stability.This process takes 1–2 weeks at a lower temperature (around 2–4°C).
Bottling & Capping
Once clarified, bottle the beer into clean, sanitized bottles.Add a small amount of sugar to trigger natural carbonation.Use a capping machine to securely seal the bottles—this must be done quickly and tightly to prevent oxidation.
Bottle Conditioning & Storage
Store the sealed bottles in a temperature-controlled, dark place for 2–4 weeks.During this time, the flavor develops further and carbonation becomes well integrated.
Refrigeration Before Drinking
After conditioning, store the beer in the fridge.Serve at a proper drinking temperature (usually 7–12°C) for best flavor.

100L Brewing System: Maintenance & Cleaning Guidelines
Daily Cleaning & Sanitization
After each use, thoroughly clean the equipment to prevent residue buildup and microbial contamination.Rinse the interior with warm water to remove visible residues.
Use food-grade detergent with a soft brush to clean the tank walls, conical bottom, and discharge valves.Rinse thoroughly with clean water to ensure no detergent remains.
Periodic Deep Maintenance
In addition to daily cleaning, perform deep maintenance monthly or quarterly.Disassemble and soak removable parts (valves, gaskets, sensor covers) in cleaning solution to remove stubborn deposits.Inspect gaskets for signs of aging or cracking and replace if necessary to maintain airtightness.Check and descale heating elements and cooling coils to ensure heat exchange efficiency.If equipped with a CIP (Clean-in-Place) system, inspect spray balls or nozzles for proper function.
Keep Equipment Dry & Ventilated
After cleaning and disinfection, thoroughly dry the tank interior or air-dry naturally.
Store the equipment in a dry, ventilated area to prevent rust or mold and prolong its service life.
Operational Cautions
Avoid scratching the inner tank surface with hard tools.Do not use strong acids or alkalis, as they may corrode the stainless steel.Take care to prevent foreign objects from blocking valves or pipelines.Maintain the temperature control system—calibrate sensors regularly and inspect electrical connections to ensure stable performance.
Routine Inspection & Care
Conduct routine inspections to detect early signs of wear or failure.Check welds, seals, electrical parts, and pipeline joints regularly.Address any issues promptly or contact the manufacturer for professional servicing and replacement parts.