
You want flavor control and repeatability—but your current setup holds you back. Missed targets, long days, hazy results. Here’s the simple, pro-grade path to plan your all-grain brew so you hit numbers, save time, and scale with confidence.
All-grain brewing equipment for a first all-grain brew typically includes a マッシュタン, ケトル, heat source, accurate 温度計, チラー, fermenter (bucket or carboy), transfer tubing with 飲み口, and sanitation tools. Plan water, grain bill, and chill method; then mash, lauter, boil, chill, 発酵, and package. Use the checklist and sizing table below to choose capacities for a 5 gallon or pilot 3 gallon バッチ.
What is an all-grain brew and how is it different from extract?
When you 醸造 all-grain, you convert starches from malted grain に fermentable sugars in your own マッシュ. In contrast, extract brewing (or brewing with malt extract) skips conversion by using concentrated syrup or powder. Both methods make great beer, and beer can be made with either path, but all-grain gives you finer control over body, color, and beer style, plus lower long-term ingredient cost.
For many ホームブルワーズ, kits are a great entry point. Then, advancing to all-grain is a natural switch from extract for a 醸造家 who wants to tweak the grain recipe, water profile, and hop schedule. This guide lays out the complete list の basic equipment plus the steps of the 醸造工程 so your first grain day feels smooth.

The complete list of basic equipment for a grain brew (table + quick picks)
Below is a compact gear map for your first grain brew. It shows what each item does, the size that fits a 5 gallon batch, and when you might upgrade.
| 設備 | 目的 | Starter Size | Pro Tip |
|---|---|---|---|
| マッシュ・タン (cooler or vessel) | Holds マッシュ そして grain bed during conversion and lautering | 8–10 ガロン | Add a false bottom; ensure a reliable 飲み口. |
| Kettle / brew kettle | Boil the 麦汁 | 10–15 ガロン | Use volume markings; strong heat source. |
| チラー (immersion or counterflow) | Cool 熱麦汁 quickly | Match kettle volume | Faster chilling improves clarity and taste. |
| 発酵槽 (bucket or carboy) | Hold cooled 麦汁 にとって 発酵 | 6.5–7 ガロン | Add a blow-off tube; keep it clean. |
| 温度計 + ハイドロメーター/refractometer | Control temps and track gravity | 該当なし | Accuracy prevents off-flavors. |
| Transfer gear | Siphon/tubing, clamps | 該当なし | Keep oxygen low after chilling. |
| Cleaning & サニタイズ kit | No-rinse sanitizer, brushes | 該当なし | 消毒 everything touching cold 麦汁. |
| Optional 穀物ミル | Crush grain fresh | 該当なし | Improves efficiency and foam stability. |
| 麦汁冷却機 | Dedicated term; see above | Sized to kettle | 選ぶ 没入 to start. |
| パッケージング | ビール瓶 or kegging | 該当なし | Kegging speeds your finished beer. |
“Dialing in process beats chasing shiny gear. Start simple, then upgrade with purpose.”
Choosing your mash tun and kettle: sizes, features, and heat
A cooler-style マッシュタン with a false bottom is classic for a first system. It’s insulated, cheap, and stable. A stainless tun adds valves and sight glasses for visibility and control. The tun must comfortably hold your amount of grain plus water. Rule of thumb for strike water is about 1.25–1.75 quarts of water per pound. That ratio sets the temperature of the mash and viscosity so the grain bed flows right.
For the boil, a 10–15 ガロン ケトル is ideal for a 5 gallon batch; a gallon stock pot may work for very small pilots, but headspace matters for foam and evaporation. If you’re running larger batches later, step to 20+ gallons of wort capacity. Choose weldless valves for easy cleaning. One mention of 醸造ケトル: stainless, tri-clamp ports, and internal markings save your 醸造 day.
A reliable heat source—propane burner or electric element—keeps the 煮沸 consistent. Propane is flexible outdoors; electric is quiet and indoor-friendly with great control. Either way, plan good ventilation and safe hose routing.
Mash water, lautering, and sparging explained (hit your numbers)
Add strike water to the mash, stir, and hold steady. Enzymes work best when the temperature of the mash is stable; a 148–156°F target is common, depending on the beer style. After conversion, the grain bed settles, forming a natural filter.
Now the flow moments: wort from the mash tun begins clear as you recirculate. Then runoff wort from the grains into the kettle. To lift efficiency, you may sparge water over the mash (batch or fly sparging). Keep the flow gentle so you don’t compact the bed. A good rule is to collect wort from the mash until you reach your pre-boil volume.
Do not rush—steady beats fast. If you’re newer, single-infusion mashing is fine. Later, experiment with step mashes. Either way, track pH and gravity to learn your system. This gives all-grain brewers consistent attenuation and clarity across バッチ after バッチ.
Boil, hops, and chilling: manage flavor and time
Bring it to a vigorous boil and watch for boil-overs. Add ホップ additions on schedule and boil your wort for 60 to 90 minutes depending on recipe needs. Use nutrition additions only as needed—most モルト bills don’t require extra sugar unless you’re chasing a big gravity or adjunct character.
Chilling matters. Rapid chilling limits DMS and locks in aroma. An 没入 coil is the easiest 麦汁冷却機 to start with; stir the coil for better heat exchange or run an ice bath if groundwater is warm. A counterflow unit cools 熱麦汁 even faster when you’re ready to upgrade your 醸造 setup. Keep the chiller clean and sanitized before and after use so your 醸造 stays bright.
When you hit pitching temperature, transfer to the fermenter carefully to reduce oxygen pickup. This is where the pro habit pays off: protect the 醸造 from air once it’s cold, and your finished beer will taste cleaner, every time.

Fermentation vessels and controls (clean beer starts here)
Choose a bucket or carboy sized with headspace—6.5–7 ガロン for a typical 5-gallon バッチ. Stainless conicals add dump ports and pressure capability later. Aerate, then pitch a healthy イースト culture at the right temperature. Control temperature from start to finish; small swings can dull hop aroma or create fusels.
Measurement drives learning. Use a ハイドロメーター または refractometer to track gravity on day 2–3 and near terminal. Keep gear spotless and サニタイズ anything that touches post-boil 麦汁. Most primary 発酵 finishes in 5–10 days; give the 醸造 a few more to condition. Cold-crash if you want bright beer before packaging.
Packaging a 5 gallon batch: bottles, kegs, and timelines
For bottling, clean and prime your beer bottles carefully. Carbonation takes 1–3 weeks at room temperature; colder storage then polishes flavor. Kegging shortens the wait: force-carb, pull a sample, and the 醸造 can pour in days. Either path is valid—pick the one that fits your space, time, and service.
Tip: Label your kegs or cases with 醸造の日 date, OG/FG, and any process notes. Future-you will thank you.
BIAB vs. traditional three-vessel (and when to scale)
BIAB (brew-in-a-bag) is the leanest route to an all-grain 醸造: one ケトル, a mesh bag, and you’re off. Lift the bag, drain into the ケトル, and you’ve essentially mashed and lautered without a separate vessel. It’s a great pilot method for a 3 gallon test バッチ, or to try a new grain recipe.
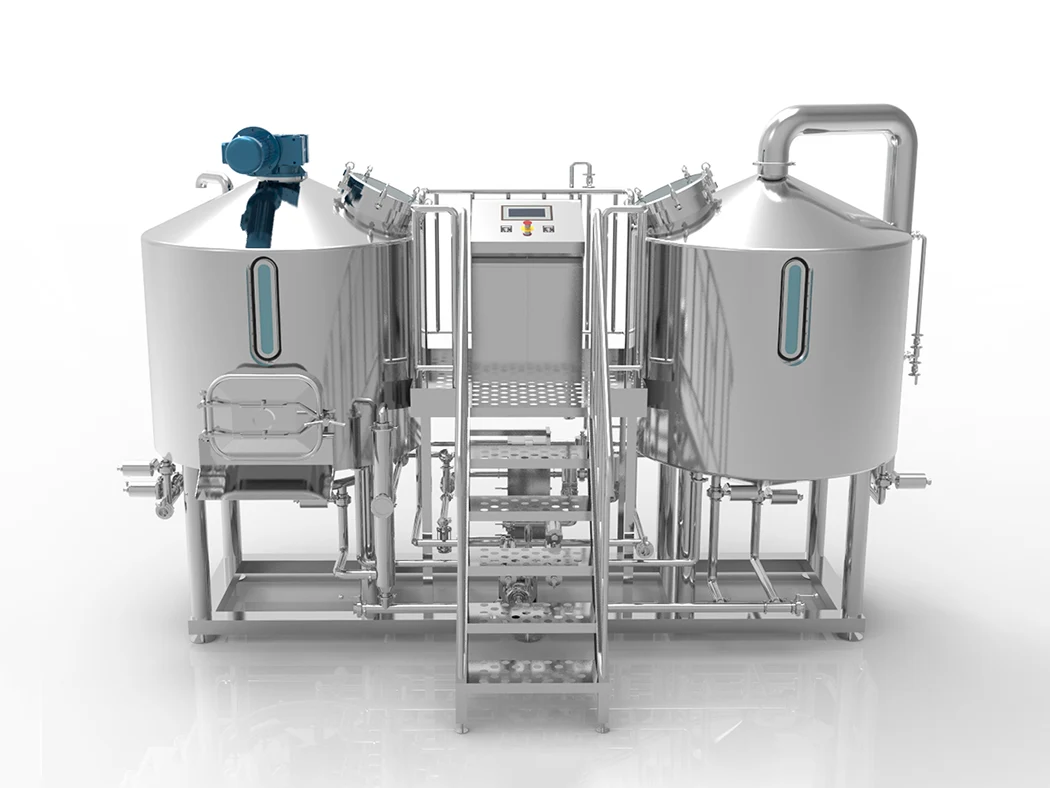
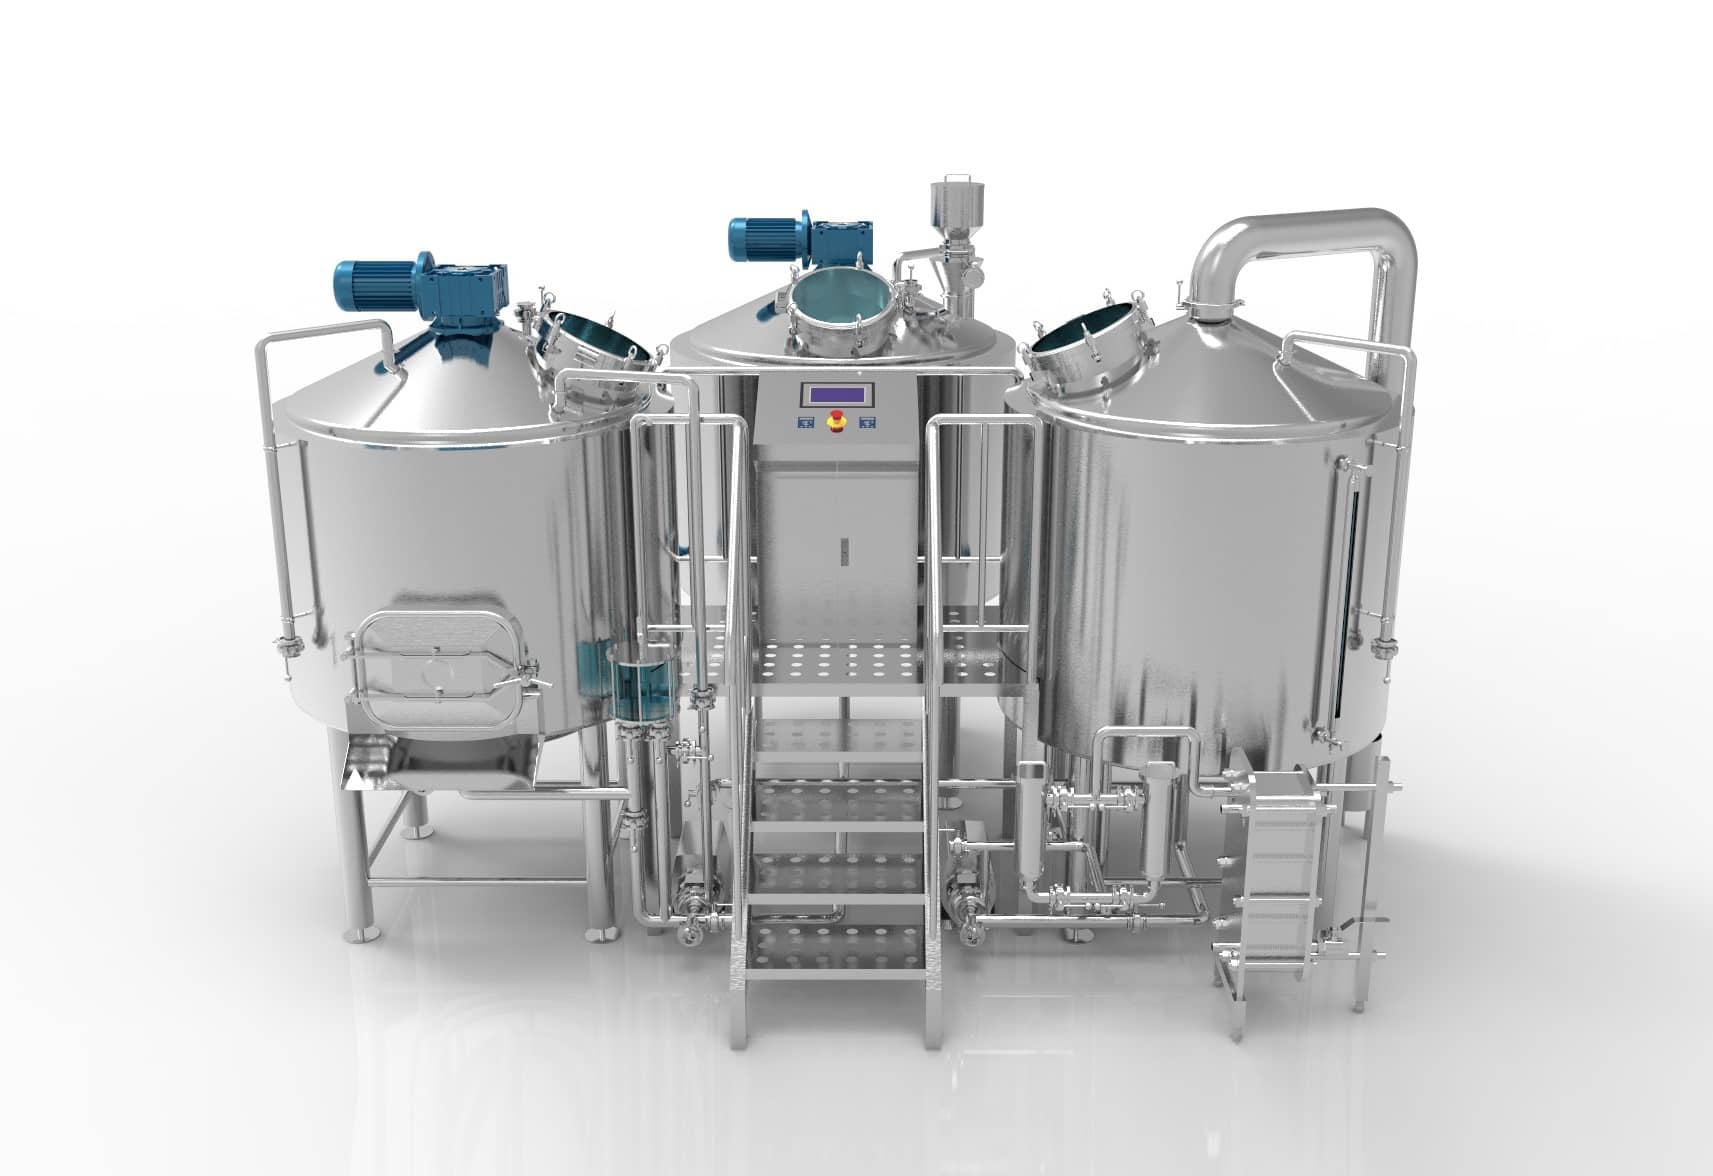
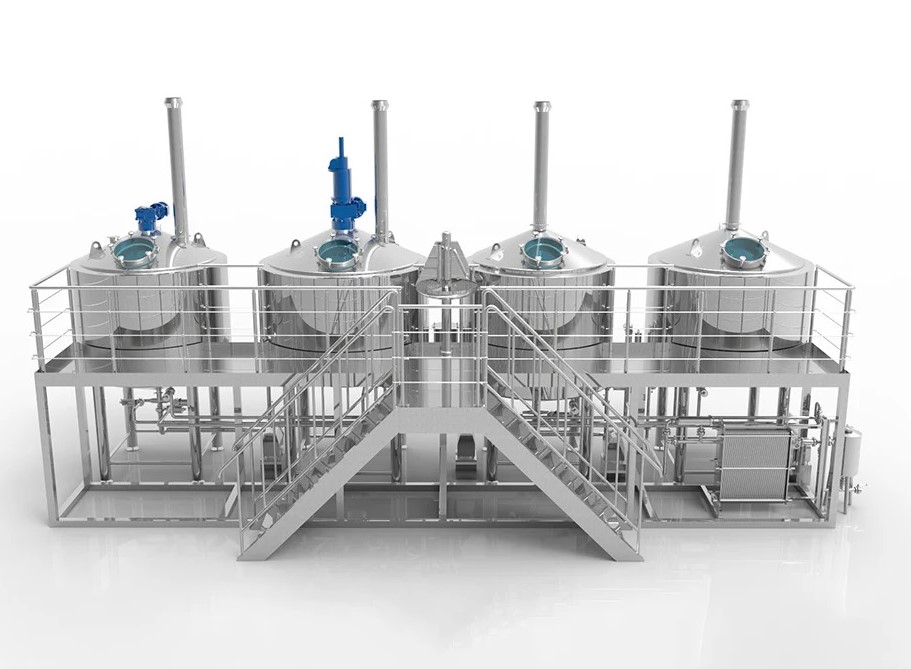
Three-vessel systems (mash, hot liquor tankそして ケトル) improve repeatability and speed—especially for a larger brew day or multi-turn schedule. Recirculation helps clarity, while separate heating zones hold stable temperatures. When your 醸造 schedule fills, three-vessel 醸造システム pay back in throughput.

Planning water volumes and grain: hit targets the first time
Before you 醸造, write out: pre-boil volume, boil-off rate, loss to trub, and fermenter target volume. That defines strike water, sparge plan, and final volume. A typical starting point is 1.5 quarts of water per pound and a steady run-off to pre-boil. Then check gravity to confirm your efficiency.
Know your amount of grain そして grain bill composition (base モルト vs adjunct). A small difference of a pound can swing original gravity noticeably, especially on smaller systems. Record everything so you can repeat the 醸造 or adjust the next バッチ.
Recipe kits, grain recipe design, and style targets
Recipe kits save time—measurements are done for you—and starter kits often include tools a first 醸造 needs. Still, designing your own grain recipe lets you chase a beer style target on your terms. Balance base grain, specialty malts, and hops for your flavor goal.
If you’re coming from extract, know that malt extract is still useful for gravity tweaks and high-gravity beers. But the heart of all-grain is the mash. The thing to remember: taste your runnings, log your gravity, and keep notes so the next 醸造 starts closer to the mark.
Safety, cleaning, and quality checks most new brewers forget
Hot surfaces, wet floors, and heavy vessels make a 醸造 day risky if you rush. Wear gloves and eye protection around burners and 煮沸. Keep hoses tidy. Label your cleaning chemicals clearly.
Quality is 80% cleaning: clean first, then サニタイズ. Measure frequently with your 温度計, ハイドロメーターあるいは refractometer to steer the 醸造 instead of guessing. If something goes off, isolate the cause and fix one thing at a time. Consistency wins.
Where to source professional gear when you outgrow the garage
When your homebrew setup is dialed and demand grows, step into professional tanks and turnkey lines. Explore ナノ醸造設備 for tight spaces and pilot production, plus a flexible path to expand. If your taproom is bustling, compare 地ビール醸造設備 packages that streamline hot-side, cellar, and utilities. For cellaring and service, pair a conical ビール発酵器 を持つ。 bright beer tank to condition and serve. Round out the line with a beer bottling machine when retail sales ramp, or consider kombucha and RTD expansions with purpose-built 昆布茶醸造装置.
These resources match the path we build for clients every week—from pilot to production—with global install and after-sales support.
Case study: from pilot to production with smarter choices
A small team began with a cooler マッシュタン, 10-ガロン ケトルそして 没入 チラー. They brewed twice weekly, packaged in beer bottles, and rotated styles to test demand. After six months, they moved to jacketed conicals, added a ブライトタンク, and standardized on two flagships. Throughput doubled without changing the 醸造 schedule—because the process was already solid.
What changed? Heat, chilling, and handling. Faster chilling protected aroma. A sealed transfer kept oxygen out. A steadier 発酵 profile made the hop pop. The lessons scale cleanly whether you’re making 10 gallons of wort or a much bigger バッチ.
Quick numbers you can use today (reference table)
| ステップ | Rule of Thumb | Why it helps |
|---|---|---|
| Strike water | ~1.5 qt per lb water per pound | Hits mash thickness fast |
| Mash rest | 148–156°F | Flavor and attenuation control |
| Pre-boil gravity | Measure & log | Confirms efficiency |
| Boil vigor | Steady roll | Drives off volatiles |
| Chill time | < 20 minutes if possible | Flavor, clarity, and stability |
| Oxygen after chill | Avoid it | Protects aroma |
“Equipment is a tool. Process is the edge.”
Your partner: a manufacturing team that scales with you
If you’ve read this far, you want control—hit targets, shorten days, and serve better pints.
We’re a Brewing Equipment Manufacturing team that designs, builds, and installs systems sized from pilot to regional production.
Jacketed tanks, CIP-ready piping, and cleanable surfaces reduce labor and risk. Data-friendly panels put power in the hands of your 醸造家.
Tell us your volume, room sketch, and utility plan—we’ll design a line that lets you 醸造 more reliably tomorrow than you did today.
We’ll spec all-grain brewing equipment layouts that match your style, budget, and growth curve, plus 穀物醸造装置 accessories that keep the line moving during peak hours. From layout to training, we build systems that are easy to clean, easy to scale, and built to last.
よくある質問
Can I start with one vessel and still make great all-grain beer?
Yes. Start with BIAB in a single ケトル and upgrade as you learn. A bag + a good burner + an 没入 coil can deliver consistent 麦汁 and clean 醸造 days. Add a small pump later for recirculation.
What volume should I choose for my first kettle?
Pick at least twice your target volume. For 5 gallon fermenter targets, a 10–15 ガロン ケトル gives boil-over room, better hop utilization, and easier temperature control.
Do I need a pump for lautering and chilling?
Not at first. Gravity works. A pump adds speed and recirculation for clearer 麦汁 期間中 lautering, plus faster chilling through a plate or counterflow unit once your 醸造 volume grows.
What tools help me track quality?
A reliable 温度計, ハイドロメーターそして refractometer. Log mash temps, pre/post-boil gravities, and final gravity. Over a few バッチ cycles, your 醸造 will land on target more often.
How do I chill in warm climates?
Pre-chill water with an ice bath feeding your 没入 coil, or upgrade to a counterflow setup. Faster chilling protects aroma and helps yeast start clean.
When should I move from bottles to kegs?
When time matters. Kegging cuts wait time and oxygen exposure. Bottling is fine, especially early, but most teams keg once they’re running more than one バッチ weekly.
Sources & further reading
- John Palmer, How to Brew (fundamentals of mash, 麦汁, and process)
- Brewer-run blogs and guild resources that document repeatable 醸造 methods and safe cellar practices
- Manufacturer datasheets for pumps, burners, and controls for exact sizing
One-page process recap (step list)
- Heat strike water, dough-in, and hold the マッシュ.
- Recirculate until clear; draw wort from the mash, then sparge water over the mash if desired.
- Boil, add ホップ charges, boil your wort to schedule.
- Chill with 没入/counterflow gear; transfer cooled 麦汁 to fermenter.
- Pitch イースト; control 発酵 temp; package and enjoy.
Final notes on capacity planning
- Start small, think big: pilot in 3 gallon または 5 gallon sizes, then plan headspace for future demand.
- Upgrade the few things that move the needle—heat, chilling, and transfers.
- Add 追加設備 only when it solves a bottleneck.
Key terms you’ll encounter as you grow (quick hits)
- ホットリカー・タンク: dedicated hot water vessel for strikes and sparges.
- 栓: valve on tuns, kettles, or fermenters for clean transfers.
- Counterflow / immersion / chiller: your options for rapid cooling.
- Wort from the mash tun: the sweet liquid headed to the boil.
Bullet-point summary (remember these)
- Size your ケトル そして マッシュタン for headspace and future growth.
- Control the temperature of the mash and flow during lautering.
- Chill fast; protect 麦汁 from oxygen post-boil.
- Measure often (温度計, ハイドロメーター, refractometer).
- Clean first; サニタイズ everything cold-side.
- Scale gear only when process is stable; partner with a manufacturer when you’re ready to expand your 醸造 line.
You’ve got this—one clean, well-planned 醸造 day at a time.