
Your dream 醸造所 is ready—but the 醸造所 choice stalls the plan. Wrong gear wastes 麦汁, money, and time. Choose a proven 醸造システム that fits space, budget, and growth.
For a microbrewery, start with a 5–15 bbl brewhouse system (2- or 3-容器) in ステンレス鋼 を持つ。 マッシュタン, ケトルそして hlt (hot liquor tank). Pair ユニタンク 発酵槽 sizes at 1–2× brewhouse volume, add a glycol チラー, コントロールパネル, ブライトタンク or conditioning in 発酵器, a 熱交換器, and safe process piping. This is the equipment you’ll need for dependable ビール醸造設備.

Article Outline
- 何 醸造所 size fits a マイクロブリュワリー and small バッチ goals?
- 2 vessel vs 3-vessel brewery system: which design suits the ホットサイド?
- どのように ホットサイド choices shape マッシュ efficiency and 麦汁 品質
- 発酵 essentials: choosing the right 発酵槽, ユニタンクそして イースト strategy
- Do you need ブライトタンク, or condition in the 発酵槽?
- Utility map: glycol, チラー, steam jackets または heating elements
- Controls, safety, and sanitary construction: details that drive uptime
- Packaging and service: ケギング, 炭酸, and clean beer line
- Floor plan & budget: opening a brewery without costly do-overs
- スケーラブル 醸造設備 packages for nano to 商業醸造所 growth
- よくある質問
What brewhouse size fits a microbrewery and small batch goals?
For most first locations, a 5, 7, or 10 bbl brewhouse balances throughput and footprint. A 5 bbl setup fits starter brewpubs; 7–10 bbl suits higher-traffic taprooms and 小規模醸造所 that plan steady distribution. Larger 醸造所 often include faster 麦汁 knockout and bigger brewhouse vessels for efficiency.
A quick capacity sketch (assumes 80% brewhouse efficiency, two brew days weekly):
| 醸造所サイズ | Weekly Beer (approx.) | Typical Fermenter Mix |
|---|---|---|
| 5 bbl | 40–60 bbl | Two 10 bbl + one 15 bbl ユニタンク |
| 7 bbl | 60–84 bbl | Two 15 bbl + one 30 bbl 発酵槽 |
| 10 bbl | 80–120 bbl | Two 20 bbl + one 40 bbl 発酵槽 |
Pro tip: plan cellar volume 1.5–2× your brewhouse. That lets you 熟成 cleanly and avoid gridlock during busy weeks.
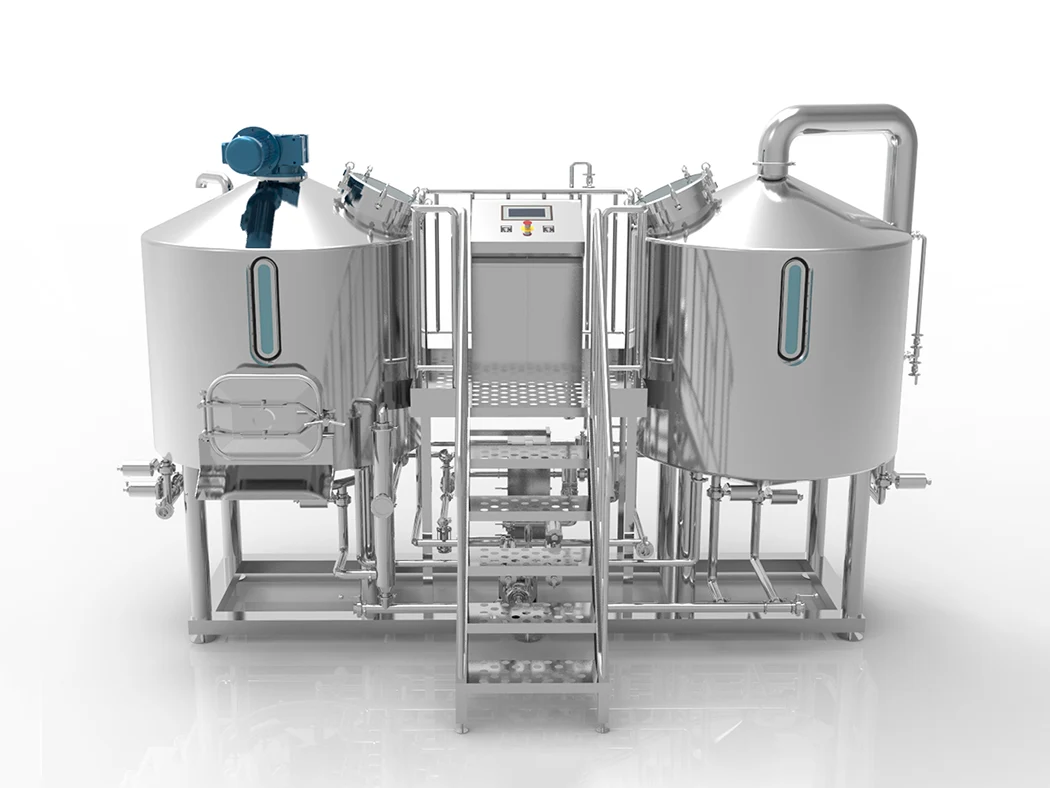
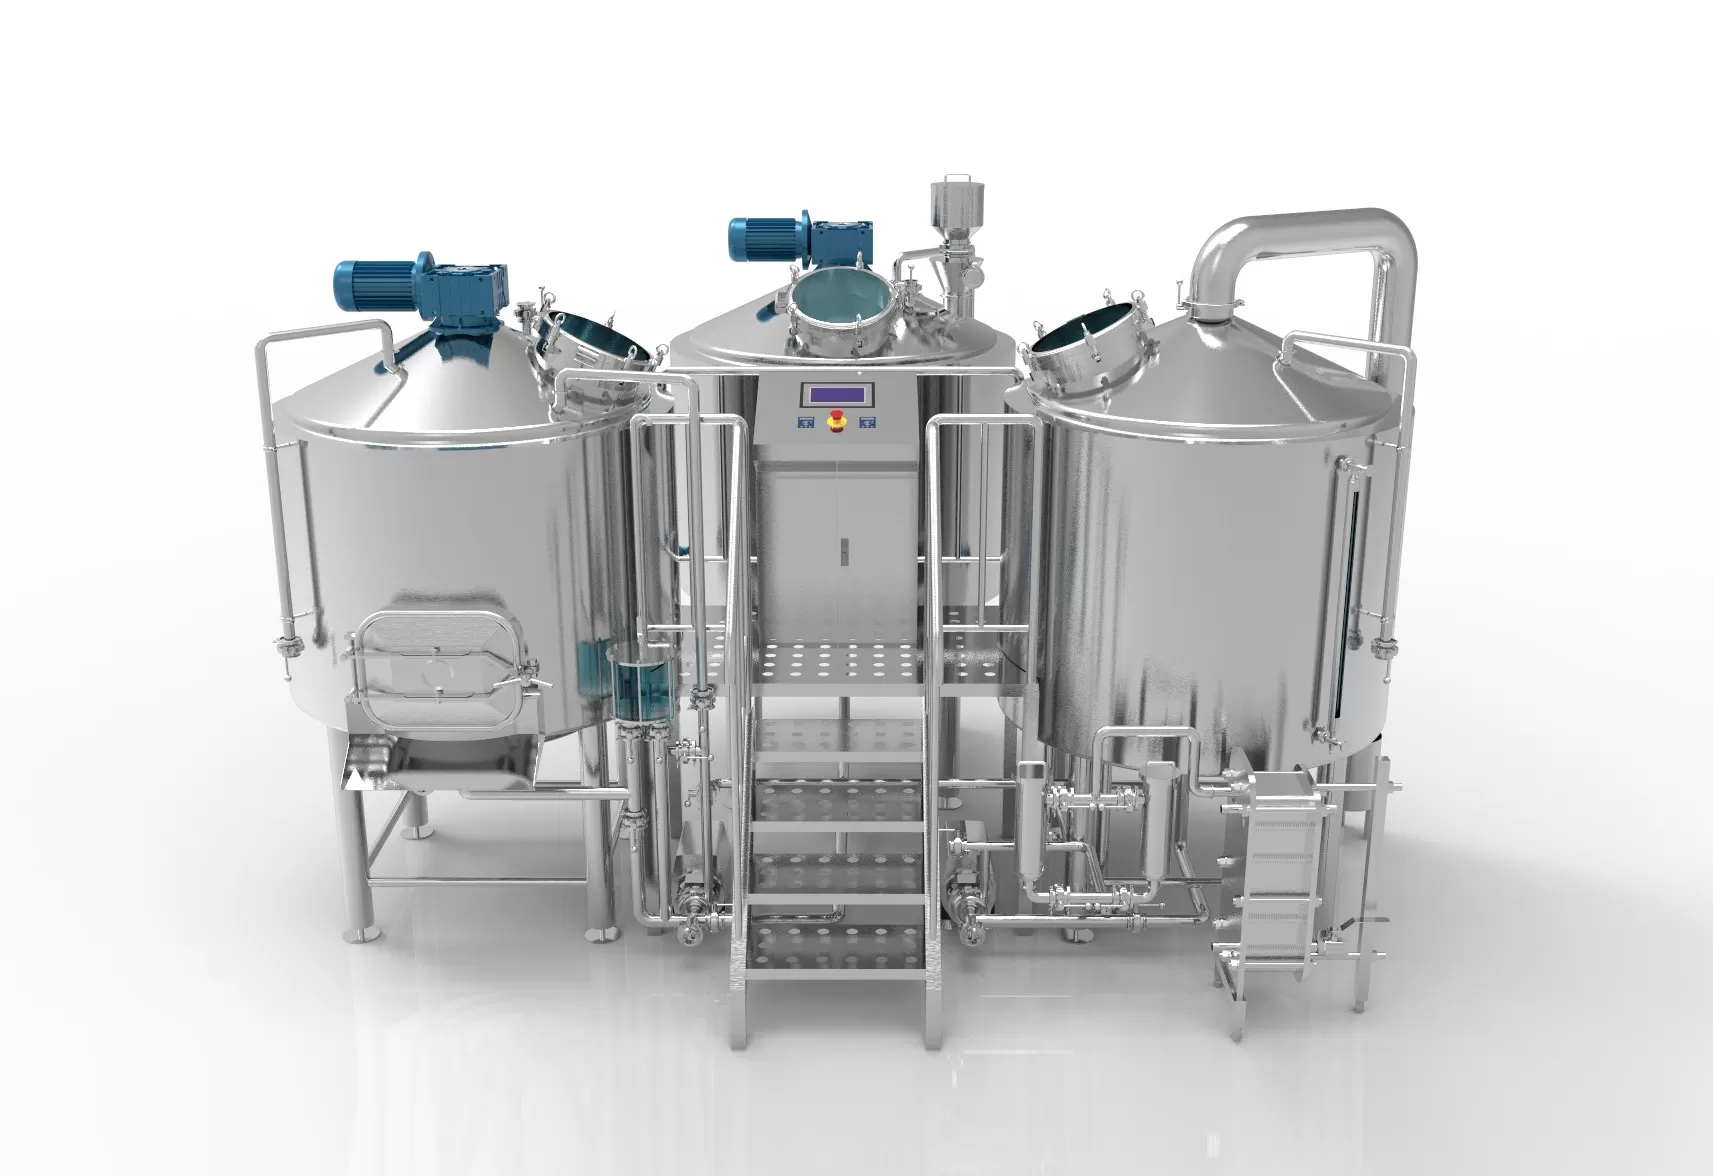
2 vessel vs 3-vessel brewery system: which design suits the hot side?
A 2 vessel configuration (MLT + ケトル/whirlpool) reduces footprint and cost while still producing excellent クラフトビール. A 3-vessel layout (マッシュタン, ラウター/tuns, ケトル/whirlpool) speeds turnarounds and improves multi-バッチ days by using separate vessels. Both choices work; match them to staffing and volume.
Comparison at a glance
| デザイン | What it includes | Why choose it |
|---|---|---|
| Two-vessel | マッシュ/lauter + 醸造ケトル/whirlpool | Smaller space, lower spend, simpler training |
| Three-vessel | マッシュ・タン, ラウター/tuns, ケトル/whirlpool | Faster 熱麦汁 turnover, higher throughput, easier stuck-mash recovery |
If you brew wide styles, a 3-vessel setup lifts flexibility; for tight budgets or nano startups, two vessels deliver strong value.
Scaling brewhouse automation? Review an automated beer brewing system package—knock-out speed, IO, and trending baked in.

How hot side choices shape mash efficiency and wort quality
On the ホットサイド, smooth grain hydration and consistent temperature steps protect extract and head retention. Proper rakes, screens, and flow paths promote clean run-off and sweet wort clarity. A plate 熱交換器 finishes the day, driving fast knock-out and safer wort chilling.
We size valves, manifolds, and process piping for low oxygen pickup. That keeps モルト character bright and bitterness clean. A well-designed exchanger also shortens whirlpool time and improves hop utilization with steady 熱麦汁 flow.
Fermentation essentials: choosing the right fermenter, unitank, and yeast strategy
ほとんどの場合 micro-breweries prefer conical ステンレス鋼 発酵槽 vessels for easy dumping, sampling, and closed transfers. A ユニタンク (ferment + condition in one) saves floorspace and speeds changeovers. Pair volume to your brew length—e.g., a 10 bbl brewhouse works smoothly with 2×10 bbl and 1×20 bbl cellar.
Healthy イースト makes the beer. Choose pitch rates that match ビール作り targets and consider a dedicated yeast propagation tank when you scale. Control temperature with insulated jackets and glycol loops for steady 発酵 curves across ales and lagers.
Dial in fermentation? See our ステンレス鋼コニカル発酵槽 options (racking arm, carb stone, PRV) and add a bright beer tank when SKUs expand.
Do you need brite tanks, or condition in the fermenter?
ブライトタンク polish clarity, dial in 炭酸, and stage packaging without tying up your 発酵器. Many teams start with ユニタンク only, then add brite capacity as SKUs grow. If you frequently filter or serve lager, brite vessels help standardize results.
Small taprooms sometimes condition in the 発酵槽 to conserve space. As volume rises, dedicated brite capacity protects schedule, especially for seasonal spikes and draft commitments.
Utility map: glycol, chiller, steam jackets or heating elements
Cooling drives control. A matched glycol チラー and manifold keep tanks precise, even during peak production. We insulate lines and spec バルブ stations for balanced flow to every jacket zone. For heating, choose steam jackets on the ケトル for fast ramps and uniform boils, or electric heating elements where steam supply isn’t feasible.
Estimated heat load by brewhouse size (illustrative):
5 bbl  | ██████████
7 bbl  | ██████████████
10 bbl | ███████████████████
Right-sizing utilities protects quality and reduces utility spend.
Controls, safety, and sanitary construction: details that drive uptime
A clean, labeled コントロールパネル with interlocks supports repeatable steps, safe starts, and quick training. We design NEMA-rated enclosures and color-coded indicators that guide the team through each stage—from dough-in to knockout.
Inside the skid, fully welded tri-clamp fittings and orbital joints maintain sanitary construction. Thoughtful CIP paths (yes, cip matters) shorten turnarounds, and ergonomic platforms reduce slips. The result: fewer stoppages and a happier brew crew.
Packaging and service: kegging, carbonation, and clean beer line
If your first sales are draft-heavy, dependable ケギング and target 炭酸 levels keep accounts loyal. Maintain cold storage and schedule line cleaning for every beer line in your taproom and partner bars. As SKUs expand, plan for canning or bottling downstream of your cellar.
For broader distribution, map SKUs, labels, and QA checks before the first run. That discipline stabilizes quality as volumes rise.
Ready to package? Start with a space-efficient beer bottling machine before full canning lines.
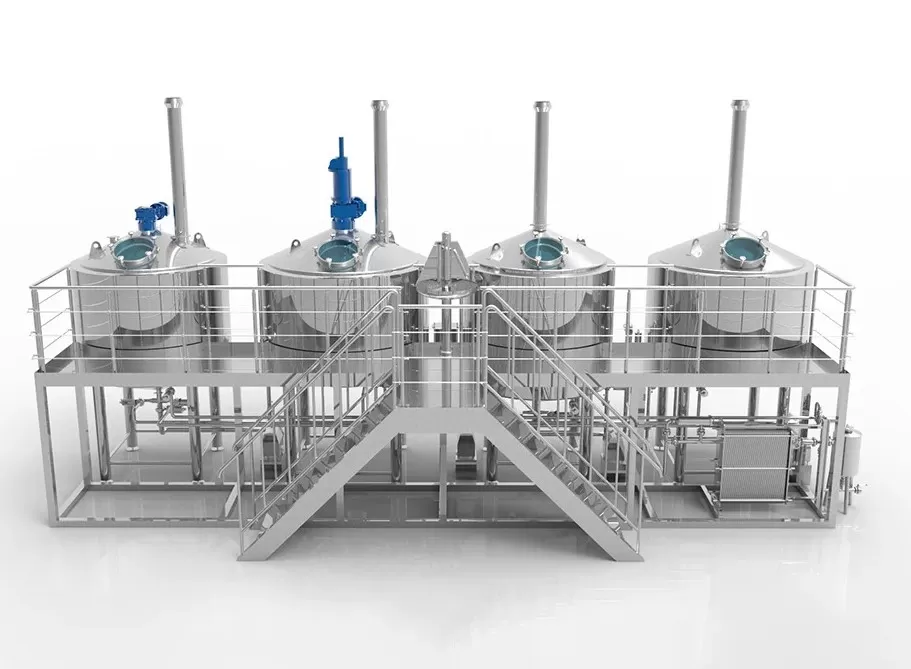
Floor plan & budget: opening a brewery without costly do-overs
Opening a brewery is a construction puzzle: drains, power, venting, grain flow, and forklift paths must mesh. Keep raw materials forward, brewing supplies at hand, and filled 樽/case egress clear. Plan room for future 醸造タンク so growth doesn’t force a shutdown.
Avoid dead corners; give the cellar space for safe hoses and carts. A simple, right-sized layout beats a cramped “Tetris” any day.
Scalable brewery equipment packages for nano to commercial brewery growth
Start tight, think big. A turnkey brewing system eases setup today and scales toward a 商業醸造所 tomorrow. We build brewpub-friendly 5–7 bbl skids that expand to multi-バッチ days with additional tuns and cellar volume. As orders build, step to commercial brewery equipment with faster knock-out, more jackets, and higher-capacity brewhouse system flow.
Prefer a modular path? Add 蒸留装置 to spin off spirits, or kombucha tanks once the taproom hums. Our teams integrate バルブ panels, process piping, and utilities so upgrades slide in with minimal downtime.Explore a 小ロット path with ナノ醸造設備 to validate recipes, train staff, and refine SOPs.

Example equipment list (your first order of battle)
Hot side
- 7–10 bbl 醸造所 (two or three separate vessels)
- マッシュ・タン with rakes and VFD pump
- ケトル/whirlpool with variable drive, steam jackets or electric heating elements
- Plate 熱交換器 sized for fast wort chilling
- Flow-balanced バルブ tree and safe drains
Cold side
- Two 2×-size 発酵槽 (e.g., 2×20 bbl) + one ユニタンク
- One or two ブライトタンク
- Glycol header, チラー, supply/return headers, and process piping
- Carb stone, spunding, sample valves, and CIP ball
Utilities & controls
- UL-labeled コントロールパネル with alarms and trending
- Grain mill, auger, grist case
- CO₂/N₂ panel for 炭酸 and purges
- ビールライン cleaning tools and QA kit
Serving & packaging
- Draft cooler and 樽 washer
- セミオート ケギング head or tabletop filler
- Space for future canning/bottling
Style flexibility, quality, and compliance
Whether you brew crispy pils, hazy IPA with heavy ホップ loads, or rich stout, the layout should protect モルト character and control DO. We weld in food-grade alloys, polish welds, and qualify passivation. That’s how ステンレス醸造 maintains a spotless, long-life finish.
Need local sourcing? We support CE/TSSA documentation and, where required, american made options via partnerships. Ask our team about city approvals and stamped drawings.
A note on all-in-one vs modular growth
アン オールインワン pilot is brilliant for recipe work and QA. Upgrade later to an all-in-one system for festivals and mobile events. When the flagship IPA explodes in demand, modular skids bolt up quickly. That’s the upside of planning for turnkey expansion from day one.
Quick reference table: which brewhouse for which plan?
| Goal | Recommended Setup | Why it works |
|---|---|---|
| Taproom-first | 5–7 bbl 2- or 3-vessel | Lower capex, good rotation, easy staffing |
| Distribution-light | 7–10 bbl 3-vessel | Faster cycles, better multi-brew days |
| Rapid growth | 10 bbl 3-vessel + cellar | Quicker turnarounds, room to scale |
“From our floor” (experience highlights)
“Clarity and speed at knockout start with mill, rakes, and the plate exchanger. Protect the 醸造工程 with balanced flows, then let the cellar shine.” — Our project engineer
We’ve seen shops thrive by sequencing deliveries: install the skid, stub in utilities, wet test, then finish fixtures. A calm ramp-up beats a rushed one.
Frequently asked questions
What’s the best first brewhouse for a 150-seat taproom?
A 7 bbl 醸造所 with a pair of 15 bbl 発酵器 and one ブライト vessel fits most 150-seat rooms. Add another 15–30 bbl 発酵槽 when your IPA rotates fast. A single 熱交換器 plate set will serve early stages.
Can I skip brite tanks at launch?
Yes—many teams condition in ユニタンク initially. When SKUs or throughput grow, add ブライトタンク to stabilize schedules and speed 炭酸 control.
Do I need steam, or will electric work?
Both work. Steam jackets ramp fast and support higher volumes; electric heating elements suit tighter budgets or where steam is tough to permit. Match utilities to goals and local code.
How often should I clean lines and tanks?
Follow a strict cip routine after each バッチ and clean every beer line weekly or per local guidance. Clean gear supports shelf life and flavor stability.
Can the same plant help with spirits or non-alcoholic products?
Yes—our team also integrates 蒸留装置 and kombucha hardware. That diversification smooths seasonality without a second build-out.
What about control and data?
A modern コントロールパネル with trending simplifies training, alarm handling, and repeatability. Operators adjust setpoints, track gravity, and manage glycol loops with confidence.
How we help
- you need reliable gear that fits day one and grows.
- our layouts protect flavor while keeping shift labor light.
- certified welds, safe platforms, smart automation—built for daily brewing.
- explore your path with these resources:
Closing summary
- Size the 醸造所 for today, but leave floor and utilities for tomorrow.
- Pick 2- or 3-容器 layouts based on throughput, staff, and style plans.
- Anchor quality with a good exchanger, tight process piping, and precise glycol control.
- 選ぶ 発酵槽/ユニタンク volumes 1.5–2× brewhouse output.
- Add ブライトタンク as SKUs grow; schedule ケギング and draft hygiene.
- Build safety, sanitary construction, and data into the コントロールパネル from day one.
- Use trusted partners for modular upgrades—your 醸造設備 should grow with you.
として Brewing Equipment Manufacturing team, we design, weld, and commission systems worldwide for クラフトビール醸造所. If you want a turnkey brewing system quote or layout review, drop us a note—tell us your space, styles, and weekly plan, and we’ll map the brewing equipment you need to make great beer.