Space is tight, funds are thinner, and regulations feel confusing. That mix stalls momentum, wastes effort, and puts flavor at risk. Use this field-tested roadmap to pick the right kit, plan the room, and pour with confidence.
Nano brewery equipment means compact vessels, controls, and utilities sized for tiny production. It covers the brewhouse, tanks, chilling, cleaning, and packaging so you can make beer in small batches with reliable control and repeatability.
As an 装置メーカー での 醸造業, we build compact lines for new teams and seasoned operators alike. Our focus is simple: help you start brewing on a small-scale system that can grow, support safe operations, and protect beer quality from day one.
What is a nanobrewery, and who is it for?
A ナノブルワリー is a tiny 醸造所 that produces beer in small batches, often measured in 1bbl runs. It bridges homebrewing to professional brewing by giving aspiring brewers a clean, safe, and repeatable 醸造工程 at a fraction of the cost while staying compliant for selling beer での taproom.
These little shops serve the brewing community: ホームブルワーズ refining beer recipes, startup teams testing market fit, and chefs and bar owners who want ultra-fresh pints. Compared with larger plants, the equipment used is lean and mobile, yet rugged enough for the daily knocks of 商業醸造.
“Start simple, learn fast, and build habits that scale.” — Advice we give every new owner.

What equipment is required for a nano brewhouse?
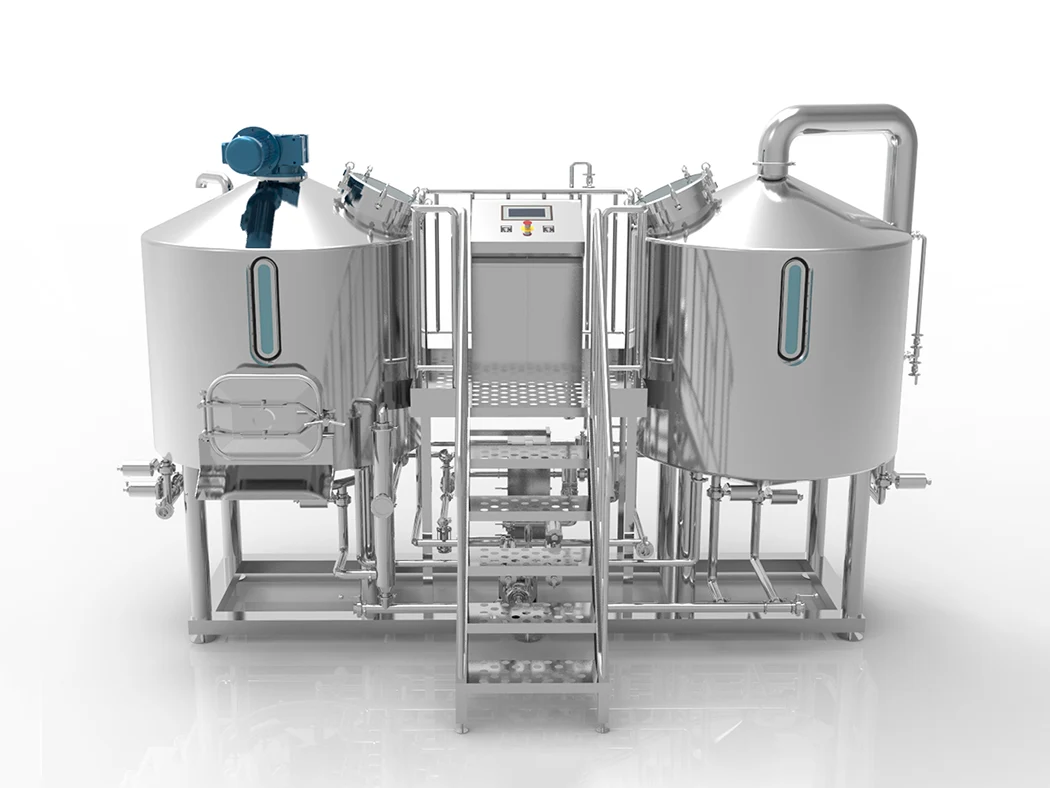
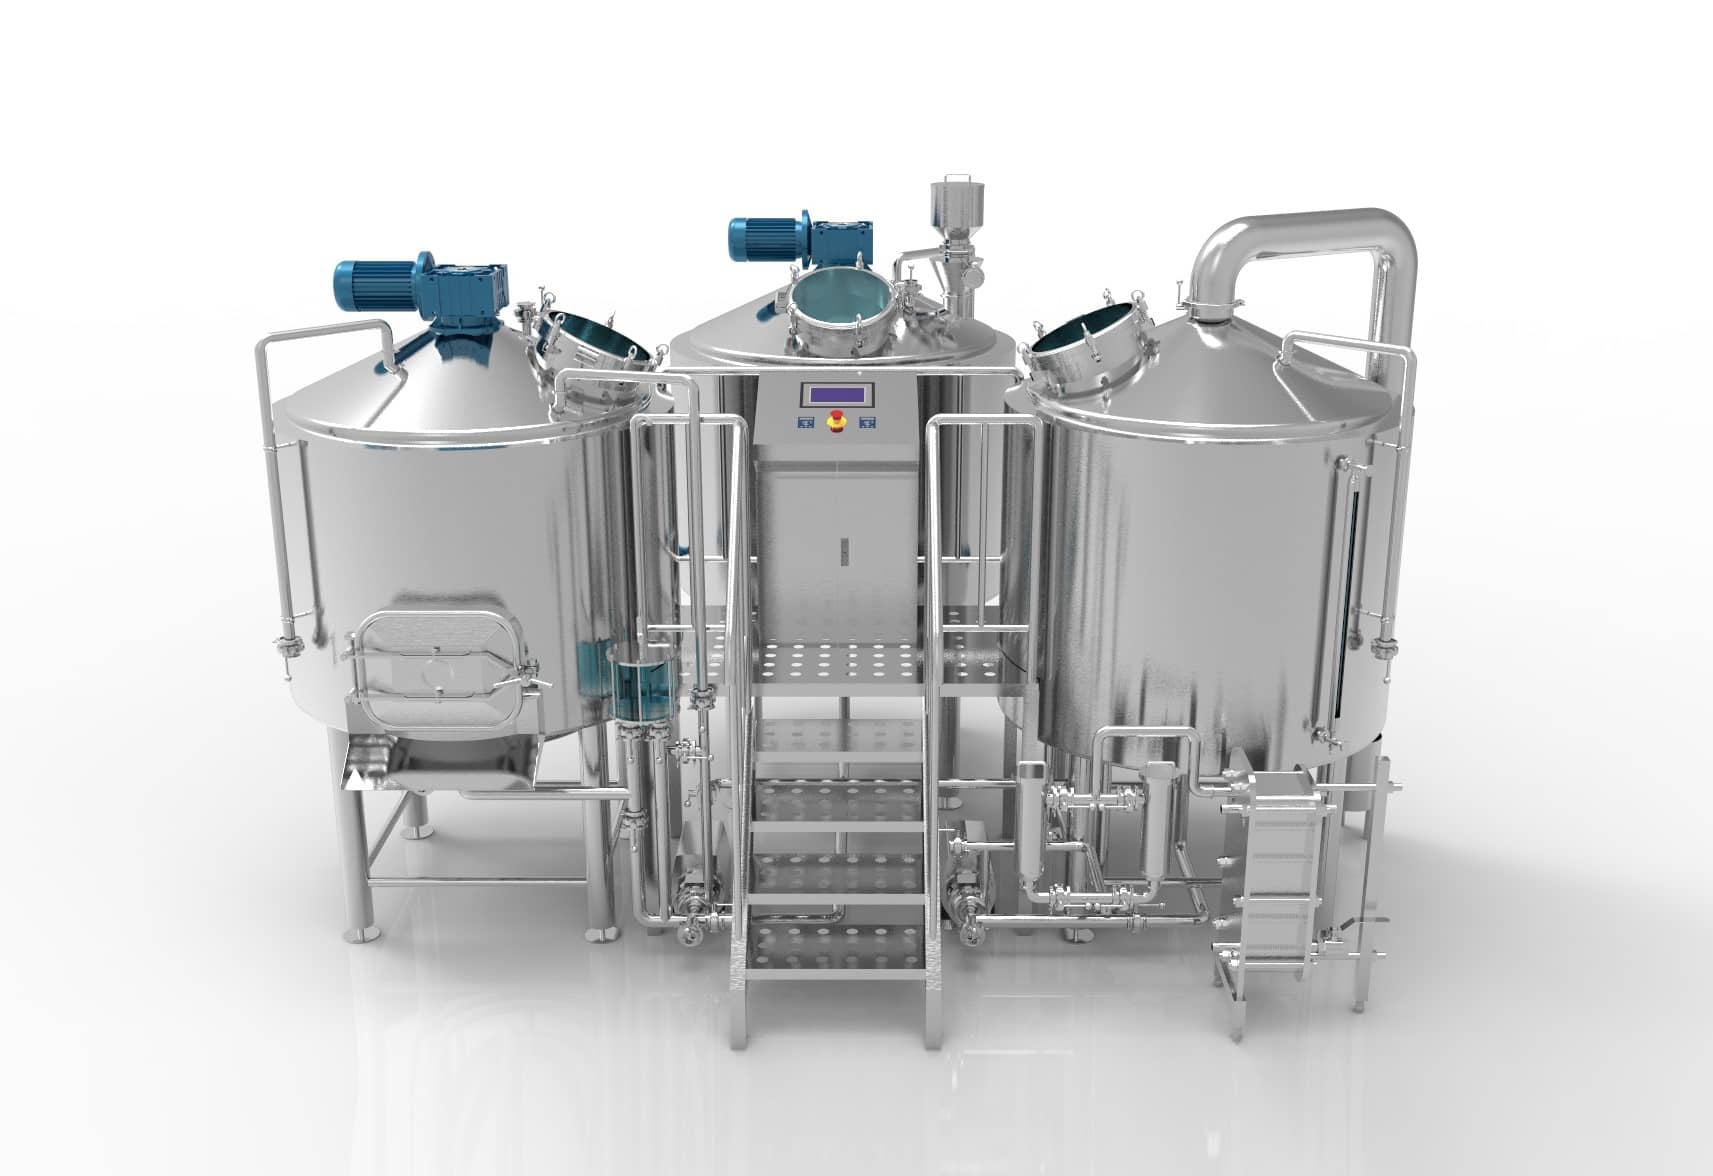
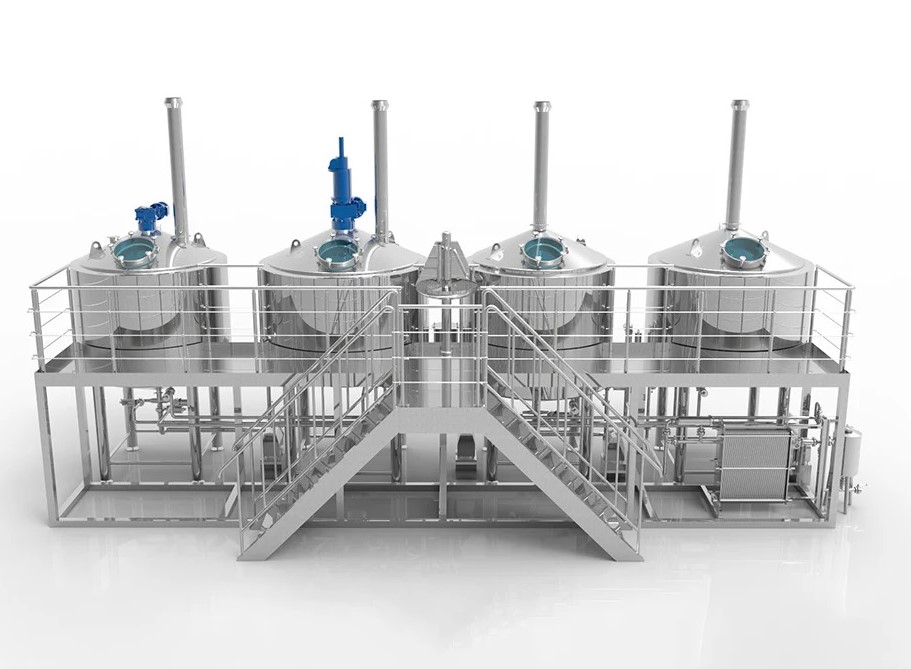
At minimum you need a two-vessel 醸造所 を持つ。 ケトル and a mash/ラウター combo, 発酵タンク, a ブライトタンク, a glycol loop with a チラー, controls, and CIP tools. That core set of 醸造設備 そして 醸造設備 forms a professional-grade brewing system when the details are right—valves that seal, probes that read correctly, and hoses that don’t kink.
Right-sizing matters. Choose tri-clamp fittings, plan headspace in each タンク, and match utilities to your バッチ plan. A well-drawn P&ID makes ops clearer for the 醸造家, reduces mistakes, and keeps the room safe for guests.
At a glance (core kit):
- Two-vessel 醸造所 (mash/ラウター + ケトル/whirlpool)
- 発酵タンク (conical, PRV, carb port)
- ブライトタンク (sight glass, carb stone, racking arm)
- Glycol チラー & manifold, insulated lines
- Control panel (temp & pump control)
- CIP cart (pump, hoses, spray ball)
- ベーシック 包装設備 (keg couplers or tabletop canner)
How do fermentation tanks and the brite tank affect beer quality?
発酵 control is the heartbeat. Conicals simplify yeast cropping and keep sediment out of transfers. With a ジャケット そして glycol cooling, the 発酵槽 holds target temperatures, preventing off-flavors and allowing precise timing for dry hopping and conditioning.
After conditioning, a ブライトタンク clarifies and carbonates the beer before service. Clean racking arms, stones, and gauges—supported by reliable CIP—help the pint sparkle, hold foam, and protect flavor stability. The tight, sanitary path from hot side to ブライト is what preserves head retention and aroma.

How big should each batch be: 1bbl, 3 barrels, or a double batch?
バッチサイズ is a balance of demand, cold-box space, and cash. A 1bbl run keeps inventory light while you experiment with hop varieties and styles. Brewing 3 barrels once demand is steady increases margins and smooths scheduling.
Think about brew length, vessel losses, and staffing. A double batch into a larger タンク can cover a busy weekend. Plan transfers so one 発酵槽 can condition while a ブライトタンク is carbonating the next release.
Quick comparison (estimates)
| Option | Approx. finished liters per run | 長所 | 考察 |
| 1bbl | ~117 L | Low risk; great for R&D and rotating styles | More brew sessions, more cleaning |
| 3 barrels | ~352 L | Better margins; steadier flow for a small taproom | Requires more cold storage and cash tied in inventory |
Chart: monthly output vs brew length
Assumes 8 runs/month and standard process losses.
Utilities: glycol, chiller capacity, and jacketed vessels explained
Quiet utilities make quality possible. Size the glycol reservoir and the チラー to handle the worst case: one vessel crashing, two at 発酵 setpoint, and a ブライト on gas. Insulate lines and use proper valves so flows are easy to direct and temps stay flat.
A jacketed ケトル stabilizes step rests and speeds cooling after the boil. If steam isn’t in play, electric elements and gentle agitation still keep 麦汁 moving and minimize hot spots for the 醸造家.
CIP and sanitation: the quiet key to consistent wort and beer
A disciplined CIP routine reduces risk and labor. Use a dedicated pump and spray ball per タンク, follow caustic with acid, rinse, then sanitize. Validate occasionally with ATP swabs so you know your stainless is truly clean.
Label quick connects, match gaskets to chemicals, and document the sequence. That habit is how small teams lock in consistency from バッチ への バッチ—and why your pints taste the same every time.
From homebrewing to a taproom: layout, licensing, and a cost effective way to start small
Move from 自家醸 to a compact 醸造所 by planning your room first. Keep the 醸造所 near the grain area, leave aisles around 発酵 rows, and stage 包装設備 by the cold box. Think about drains, make-up air, and power before buying ビール醸造設備.
A cost effective way への start small is a two-vessel kit with two 発酵タンク and one ブライトタンク. That gives you steady rotation while you learn. Involve the brewing community early to share notes on permits, taxes, and the timeline for startup costs.
Pro tip: Most owners sketch the floor twice—once for day-one and once for the next two tanks—so trench lines, outlets, and hose runs are “future-proof.”
A realistic brew day: mashing process to packaging equipment
On 醸造の日, heat strike water, begin the mashing process, and circulate until conversion. Lauter, boil in the ケトル, and chill the 麦汁 to pitching temperature. Set glycol targets and let 発酵 work while you track gravity and sensory checks.
Finish by moving bright beer into a 樽 or cans. For brewing beer that travels well, keep cold-chain, seams, and DO low. Even boil kettles benefit from good vents and pressure relief to keep the team safe.

Scaling up: turning nanos into a viable business that goes beyond just brewing
“Nanos” grow by dialing in three core styles, measuring demand, and scaling only what sells. Scaling can be more タンクs or longer production days, eventually stepping toward full-scale nanobrewery production as demand rises.
Remember the guest. A 醸造所 thrives by hospitality beyond just brewing—service, story, and clean glassware. With steady habits, the small shop becomes a viable business and a trusted local brand.
How an equipment manufacturer and equipment supplier supports your journey
As an 装置メーカー, we design turnkey lines that fit the room, drains, and codes, and we also offer a pilot brewing system for recipe work and pilot brewing. Many manufacturers offer utilities skids, crush stations, and load cells so compact teams can run like pros.
As your 機器サプライヤー, we help specify add-ons—an extra タンク, a canner, or a チラー—and we service the gear. 業務用醸造設備 should be modular, so your 醸造システム evolves with demand and your team’s brewing experience grows.
Case study: tiny room, big results
Room: 60 m² production with a small service bar
Kit: Two-vessel 醸造所, two 発酵タンク, one ブライトタンク, compact glycol skid
Process: Rotate flagships; use trials for seasonal クラフトビール
Results after month 6
- Average sell-through: 85% of a run in 12 days
- Waste: cut by 20% through better CIP and hose management
- Revenue: +30% after adding a second 発酵槽
“We proved demand with 1bbl runs, then added capacity in month five. Same footprint, more throughput.”
Sample nano layout (text-only)
- Hot side: mill → mash/ラウター → ケトル/whirlpool (heat source: electric)
- Cold side: heat-exchanger → 発酵 row → ブライトタンク by cold-box door
- ユーティリティ: glycol manifold above the tanks; drains in straight lines; GFCI for pumps
- QA: simple hydrometer & pH meter; DO checks at package
- Admin: labeler shelf, COAs binder, SOP folder
よくある質問
What batch should I start with—1bbl or 3 barrels?
Start with the volume you can sell in two weeks. 1bbl keeps risk low; 3 barrels improves margin once you have reliable taps.
Can nano gear be used at home?
Some compact skids can be used at home for pilots, but check local codes before selling beer.
Do I need a separate brite tank?
If your 発酵槽 can carb and serve, you might skip it. A dedicated ブライトタンク speeds turns and helps clarity.
How long does a typical lauter and boil take?
It varies by system, but expect 45–75 minutes to lauter and 60–90 minutes to boil in the ケトル depending on the recipe.
Is nano a path to bigger production?
Yes. Many owners start small, prove demand, and then plan scaling—extra タンクs, more cold storage, or a move to a larger site.
Can nano systems make consistent craft beer?
Absolutely—when temp control, cleaning, and transfers are tight. That’s why 発酵 control and CIP are non-negotiable.
Sources & further reading
- Brewers Association – Starting a Brewery
- TTB – Brewer’s Notice
- Master Brewers Association – Technical Resources
Key takeaways
- Match バッチ to demand; don’t let inventory outrun cold storage.
- Protect beer quality with clean transfers, tight 発酵 control, and smart CIP.
- Right-size glycol, チラー, and power. Plan drains and hose runs before installation.
- Use the 醸造所 to learn quickly; then add タンクs methodically as sales prove out.
- Work with an 装置メーカー and trusted partners for drawings, training, and support—so the system grows with you.
Note for readers: This guide focuses on practical selection and operations for nano teams—from 自家製醸造 roots to a small public room. It’s meant to lower risk, speed learning, and help you choose gear that fits your goals today and tomorrow.