
The first step to getting started with craft beer brewing is choosing to own a craft beer brewing kit. Brewing your beer at home is much easier than most people think. When you brew at home, you can create a very simple operation in a spare room of your home or your garage. The brewing equipment package you need is affordable and won’t take up a lot of space. Whether you’re a beginner or a brewmaster looking to update your brewing equipment, Micet Group has a beer-making kit to suit your experience level and interests.
¿Qué es la cerveza artesanal y cómo la elaboramos?
I know this may sound basic, but to be a craft brewer we need to understand the most basic craft. Craft beer is composed of 4 ingredients – water, malt, hops and yeast.
Guía para principiantes sobre la elaboración de cerveza artesanal:
- Preparas los ingredientes y preparas el equipo (limpieza)
- Agregar y mezclar ingredientes
- agregar levadura
- Deja fermentar la cerveza durante unos 14 días.
- Prueba si la cerveza está lista.
- embotellar cerveza
- ¡Disfruta de tu lote elaborado!
- Equipos de limpieza + desinfección
The beer brewing process for beginners can take about 21 to 28 days, depending on the style of beer. you’ll need about 20 minutes to combine the ingredients and then let them soak for about seven days. After that, the beer is bottled (which takes about 40 minutes) and allowed to ferment. Once the beer has been in the bottle for two weeks, you can chill it and enjoy it.

¿Qué kit de inicio necesita un principiante para elaborar cerveza?
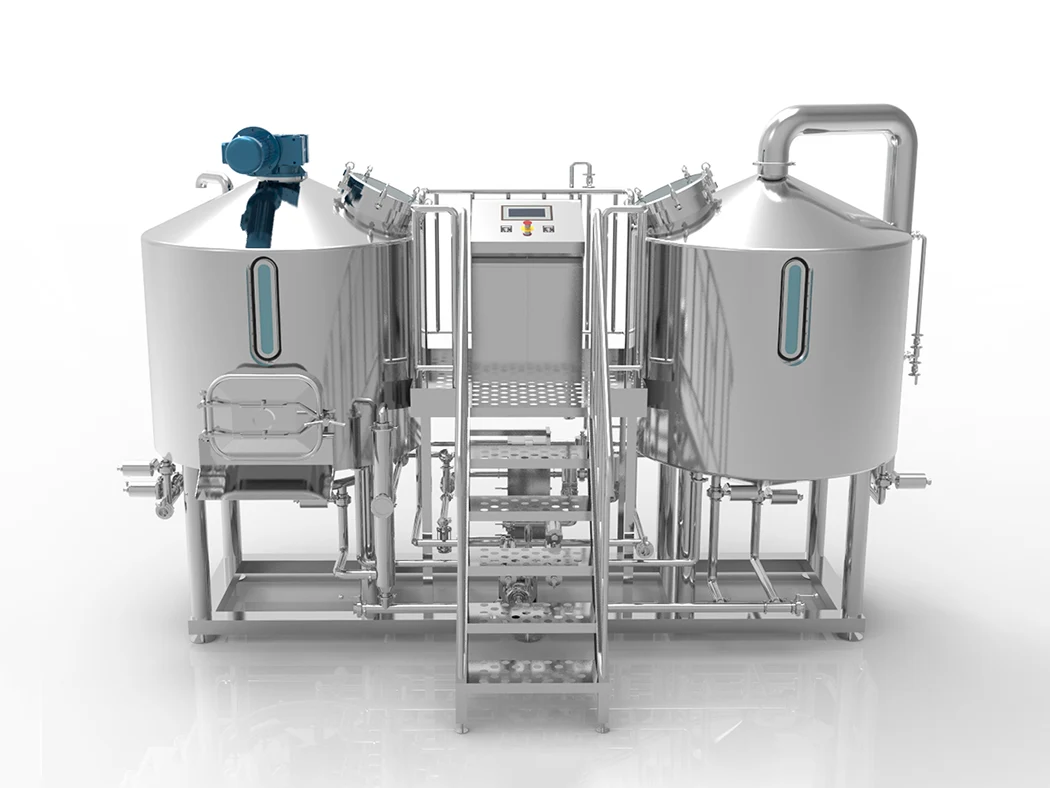
Un kit de inicio debe incluir un balde de fermentación, un balde de embotellado, una varilla de embotellado, una taponadora, un sifón automático, un tubo de transferencia, un hidrómetro, una esclusa de aire y una solución desinfectante. Además de su kit de preparación, también necesitará una olla/hervidor lo suficientemente grande para preparar cerveza y un quemador de propano. Algunas personas usan una estufa de cocina, pero puede que no sea lo suficientemente grande como para contener una tetera de 7 a 8 galones. Un termómetro digital también es útil e imprescindible para las temperaturas de remojo y cabeceo. Antes de empezar a elaborar cerveza artesanal, es necesario contar con el equipo y los ingredientes adecuados. Para los principiantes, los puntos clave de la elaboración de cerveza incluyen:
- kit de cerveza
- Olla de más de 4 galones
- Tanque de fermentación
- Bloqueo de aire o tapón
- Caña estante/sifón automático
- palo de embotellado
- Termómetro
- Escala digital
- Tubería de PVC (tubería de cerveza de ⅜ de pulgada)
- Botella
- Tapas de botellas y máquinas taponadoras
- Limpiador sin enjuague y desinfectante de calidad alimentaria.
For your first time brewing beer at home, a starter kit is the right choice because it comes with all the equipment and ingredients you need to brew your first batch of beer. We don’t recommend all-grain brewing for beginners, as things like partial mashing and all-grain brewing need more advanced techniques.
Consejos sobre kits de cerveza para nuevos cerveceros caseros
Micet cree que hay algunas cosas en la elaboración de cerveza que son útiles para los nuevos cerveceros caseros. Aquí hay algunas sugerencias como referencia.
- Kettle: Like many winemakers, buy a starter equipment kit. Once you have it, all you need is a brewing kettle and ingredients, and you’re ready to brew.
- Enfriador de malta: una de las mejores formas de reducir la probabilidad de contaminación de la cerveza es enfriar el mosto lo más posible, bajando la temperatura fuera del rango peligroso que prefieren las bacterias dañinas. Muchos cerveceros caseros nuevos hacen esto sumergiendo su olla de preparación en un baño de hielo en una tina o tina grande. Al comprar un enfriador de mosto, puede ahorrar mucho tiempo, evitar molestias y reducir el riesgo de contaminación.
- Sifón automático: Ya sea que esté transfiriendo del hervidor al fermentador principal o de la rejilla al barril, el sifón automático es su herramienta principal. La mayoría de las configuraciones de preparación de nivel de entrada incluyen un sifón automático de 5/16 de pulgada. Cuando se compran, normalmente cuestan alrededor de $10 aproximadamente.
- Iniciador de masa madre: ya sea que compre un tubo de levadura, un paquete de levadura o un paquete de levadura seca, hacer un iniciador de masa madre es una excelente manera de garantizar que su ciclo de fermentación tenga un buen comienzo. Solo toma unos 20 minutos completarlo y mejora sus posibilidades de obtener una etapa de fermentación primaria fuerte y activa. Esto también reduce la posibilidad de contaminación porque el azúcar se convierte en alcohol más rápido cuando la levadura es sana y abundante.
- Oxigenación del mosto: cuando se completa la fase caliente y el mosto se ha enfriado, queda poco oxígeno, que la levadura necesita para comenzar una fermentación vigorosa.
- Use a blow tube: Using a blow tube instead of an airlock doesn’t mean your beer won’t taste great. It means there won’t be any mess on your hands. Place one end of a tube into the top of the plug and dip the other tube into the disinfectant, and you’re good to go. Some Clawson may get into your solution bucket through the tubing, so it’s not a bad idea to check and replace the sanitizer a few times a day.
- Mash Bag: Without a mash tun, they couldn’t start brewing all-grain beer. Incorrect! If you have a quality sleeping bag, place the mash in a brew kettle (heat it!) and wrap it in the sleeping bag for 60 minutes. You’ll be surprised at how well the temperature is maintained. Check after about 15 minutes and add boiling water if you need to raise the temperature.

5 pasos importantes para preparar cerveza para principiantes
Elaborar cerveza casera es una forma divertida de ahorrar dinero y disfrutar de diferentes tipos de cerveza. Antes de preparar su primer lote de cerveza, necesita equipo. Invertir en el equipo adecuado al comienzo de su proyecto de elaboración de cerveza casera le ahorrará muchos dolores de cabeza, frustraciones y desperdicio de ingredientes.
- Manténgalo limpio: la regla más importante para los cerveceros caseros es la higiene, especialmente durante el proceso de enfriamiento. Venda un enfriador de inmersión de serpentín fácil de limpiar para enfriar su mosto y reducir el riesgo de contaminación.
- Prepare la levadura: Primero, no deje que la levadura repose en el refrigerador durante meses. En segundo lugar, debes proporcionar a la levadura la cantidad correcta de nutrientes y oxígeno para que haga su trabajo. Si la levadura está contenta, te recompensa con una mejor cerveza.
- Manténgase alejado de las estufas: cuando hierve, puede causar un desastre en la cocina. En su lugar, use un quemador de propano y un patio, garaje o espacio de entrada donde pueda calentar la cerveza, y tenga lista una manguera o una botella rociadora cuando hierva el hervidor o agregue lúpulo.
- Buy a glass fermenter: Plastic fermenters are fine and work, but glass fermenters last longer, don’t leak, and are easier to sterilize.
- Alcohol content: Managing the higher gravity fermentation of stronger, higher alcohol content beers can be tricky when you’re starting out. If it’s too light, there’s less room for error because there’s no place to hide any flaws. Beginners should keep alcohol content in the 5% to 7% range.
Pasos a seguir para elaborar cerveza artesanal
- Mantén tu kit de cerveza seguro. La llegada de los kits de cerveza hará la vida más fácil a cualquiera que pruebe la elaboración de cerveza casera por primera vez. Cuando dices kit de cerveza, incluirías concentrado de malta y levadura. Esto también incluirá alguna orientación sobre cómo utilizar los ingredientes de fermentación para elaborar cerveza. Algunos posibles ingredientes recomendados incluyen azúcar de elaboración, jarabe de arroz y jarabe de maltosa líquido.
- Prepare beer. Brewing beer begins with sanitizing and cleaning the equipment required in the process. After the equipment is sterilized, prepare two quarts of water, heat it to about 160 degrees Fahrenheit and remove the heat. If done, add the contents of the beer kit and cook according to the set instructions. With this kit, you’ll learn that it’s best to let the ingredients dissolve before putting the lid on. Once you have done this, you need to pour the contents into the cold water in the fermenter. Mix well again and allow fermentation to proceed at the recommended temperature.
- Watch the fermentation process. This is the process of turning malt into beer. The initial stages of beer fermentation can last several days, and the key to this step is to watch the temperature . So how do you know your beer is ready to be bottled? Now there are two ways to tell if it is ready for packaging. The first is to check the bubbles coming out of the lock; if no more than one bubble bursts per minute, it means it is ready. Another test is to check for yeast. If it’s at the bottom, it’s ready for bottling.
- El último paso es la parte de embotellado y vertido. Durante el proceso de puesta en marcha, se mezclará azúcar con la cerveza para favorecer la fermentación. Ahora transfiera la cerveza al cubo de imprimación, agregue el azúcar y mezcle. Después de esto, la cerveza está lista para ser embotellada.