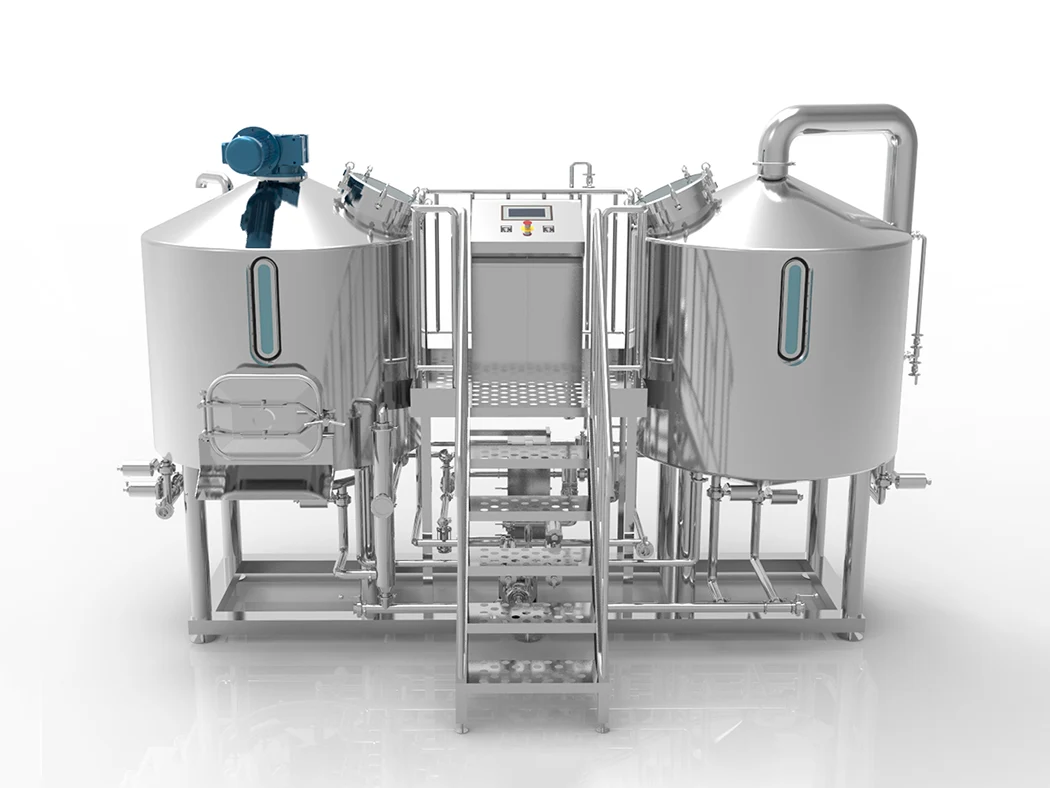
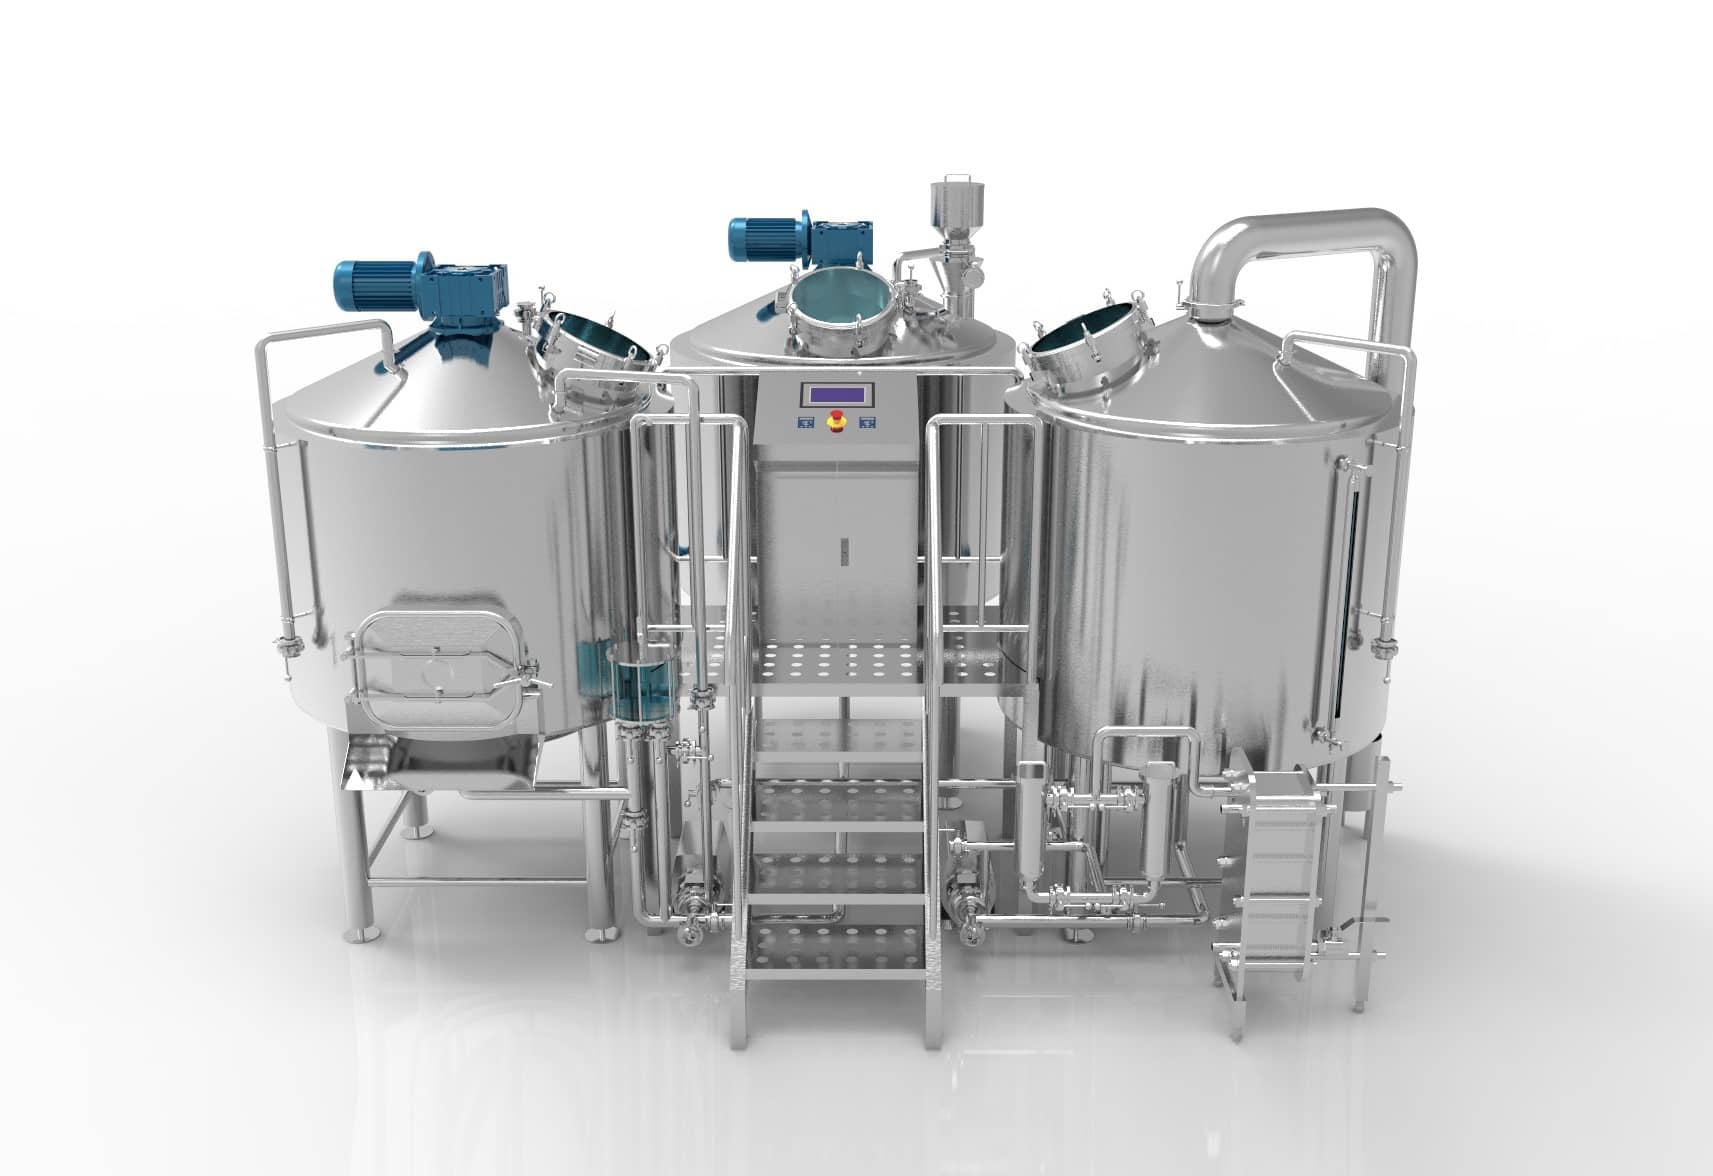
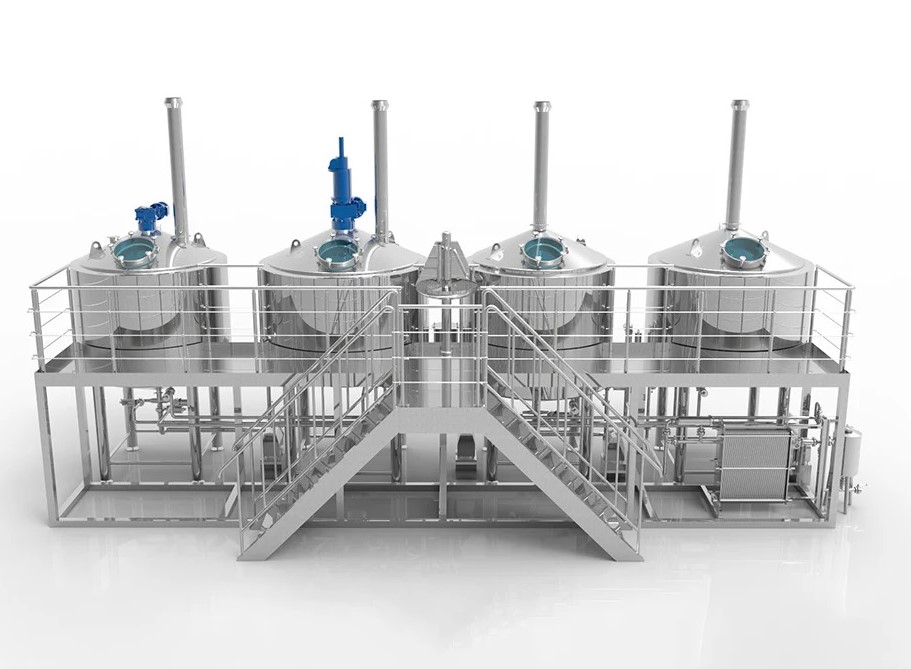

The first step to getting started with craft beer brewing is choosing to own a craft beer brewing kit. Brewing your beer at home is much easier than most people think. When you brew at home, you can create a very simple operation in a spare room of your home or your garage. The brewing equipment package you need is affordable and won’t take up a lot of space. Whether you’re a beginner or a brewmaster looking to update your brewing equipment, Micet Group has a beer-making kit to suit your experience level and interests.
O que é cerveja artesanal e como a fabricamos?
I know this may sound basic, but to be a craft brewer we need to understand the most basic craft. Craft beer is composed of 4 ingredients – water, malt, hops and yeast.
Guia para iniciantes na fabricação de cerveja artesanal:
- Você prepara os ingredientes e prepara o equipamento (limpeza)
- Adicione e misture os ingredientes
- Adicione fermento
- Deixe a cerveja fermentar por cerca de 14 dias
- Teste se a cerveja está pronta
- Engarrafamento de cerveja
- Aproveite o seu lote preparado!
- Equipamento de limpeza + desinfecção
The beer brewing process for beginners can take about 21 to 28 days, depending on the style of beer. you’ll need about 20 minutes to combine the ingredients and then let them soak for about seven days. After that, the beer is bottled (which takes about 40 minutes) and allowed to ferment. Once the beer has been in the bottle for two weeks, you can chill it and enjoy it.

Qual kit inicial um iniciante precisa para fazer cerveja?
Um kit inicial deve incluir um balde de fermentação, balde de engarrafamento, varinha de engarrafamento, tampador, sifão automático, tubo de transferência, hidrômetro, câmara de ar e solução sanitizante. Além do kit de preparo, você também precisará de uma panela/chaleira grande o suficiente para preparar e um queimador de propano. Algumas pessoas usam um fogão de cozinha, mas ele pode não ser grande o suficiente para acomodar uma chaleira de 7 a 8 galões. Um termômetro digital também é útil e essencial para temperaturas de imersão e lançamento. Antes de começar a fabricar cerveja artesanal, você precisa ter os equipamentos e ingredientes certos para a cerveja. Para iniciantes, os pontos-chave da fabricação de cerveja incluem:
- Conjunto de cerveja
- Pote com mais de 4 galões
- Tanque de fermentação
- Bloqueio de ar ou plugue
- Cana de prateleira/sifão automático
- Vara de engarrafamento
- Termómetro
- Escala digital
- Tubo de PVC (tubo de cerveja de ⅜ polegada)
- Garrafa
- Tampas de garrafas e máquinas de tampar
- Limpador sem enxágue e desinfetante de qualidade alimentar
For your first time brewing beer at home, a starter kit is the right choice because it comes with all the equipment and ingredients you need to brew your first batch of beer. We don’t recommend all-grain brewing for beginners, as things like partial mashing and all-grain brewing need more advanced techniques.
Conselhos sobre kits de cerveja para novos cervejeiros caseiros
Micet acha que há algumas coisas na fabricação de cerveja que são úteis para os novos cervejeiros caseiros. Aqui estão algumas sugestões para referência.
- Kettle: Like many winemakers, buy a starter equipment kit. Once you have it, all you need is a brewing kettle and ingredients, and you’re ready to brew.
- Malt Cooler: Uma das melhores maneiras de reduzir a probabilidade de contaminação da cerveja é resfriar o mosto o máximo possível, baixando a temperatura para fora da faixa perigosa preferida pelas bactérias nocivas. Muitos novos cervejeiros caseiros fazem isso submergindo sua panela em um banho de gelo em uma grande banheira ou banheira. Ao adquirir um refrigerador de mosto, você pode economizar muito tempo, evitar complicações e reduzir o risco de contaminação.
- Sifão Automático: Esteja você transferindo da chaleira para o fermentador principal ou da prateleira para o barril, o sifão automático é sua ferramenta principal. A maioria das configurações básicas de fermentação inclui um sifão automático de 5/16 polegadas. Quando comprados, eles geralmente custam cerca de $10 ou mais.
- Iniciador de massa fermentada: Quer você compre um tubo de fermento, um pacote de fermento ou um pacote de fermento seco, fazer uma entrada de massa fermentada é uma ótima maneira de garantir que seu ciclo de fermentação tenha um ótimo começo. Leva apenas cerca de 20 minutos para ser concluído e aumenta suas chances de obter um estágio de fermentação primária forte e ativo. Isto também reduz a chance de contaminação porque o açúcar é convertido em álcool mais rapidamente quando o fermento é saudável e abundante.
- Oxigenação do mosto: Quando a fase quente termina e o mosto é resfriado, sobra pouco oxigênio, que a levedura precisa para iniciar uma fermentação vigorosa.
- Use a blow tube: Using a blow tube instead of an airlock doesn’t mean your beer won’t taste great. It means there won’t be any mess on your hands. Place one end of a tube into the top of the plug and dip the other tube into the disinfectant, and you’re good to go. Some Clawson may get into your solution bucket through the tubing, so it’s not a bad idea to check and replace the sanitizer a few times a day.
- Mash Bag: Without a mash tun, they couldn’t start brewing all-grain beer. Incorrect! If you have a quality sleeping bag, place the mash in a brew kettle (heat it!) and wrap it in the sleeping bag for 60 minutes. You’ll be surprised at how well the temperature is maintained. Check after about 15 minutes and add boiling water if you need to raise the temperature.

5 etapas importantes para preparar cerveja para iniciantes
A fabricação de cerveja caseira é uma maneira divertida de economizar dinheiro e desfrutar de diferentes tipos de cerveja. Antes de preparar seu primeiro lote de cerveja, você precisa de equipamento. Investir no equipamento certo no início de seu empreendimento de fabricação de cerveja caseira evitará muitas dores de cabeça, frustração e desperdício de ingredientes.
- Mantenha-o limpo: A regra mais importante para os cervejeiros caseiros é a higiene, principalmente durante o processo de resfriamento. Venda um refrigerador de imersão em bobina fácil de limpar para resfriar seu mosto e reduzir o risco de contaminação.
- Prepare o fermento: Primeiro, não deixe o fermento na geladeira por meses. Em segundo lugar, você deve fornecer à levedura a quantidade correta de nutrientes e oxigênio para realizar seu trabalho. Se o fermento estiver feliz, ele recompensa você com uma cerveja melhor.
- Mantenha longe de fogões: Quando ocorre fervura, pode causar bagunça na cozinha. Em vez disso, use um queimador de propano e um pátio, garagem ou garagem onde você possa aquecer a cerveja e tenha uma mangueira ou borrifador pronto quando ferver a chaleira ou adicionar lúpulo.
- Buy a glass fermenter: Plastic fermenters are fine and work, but glass fermenters last longer, don’t leak, and are easier to sterilize.
- Alcohol content: Managing the higher gravity fermentation of stronger, higher alcohol content beers can be tricky when you’re starting out. If it’s too light, there’s less room for error because there’s no place to hide any flaws. Beginners should keep alcohol content in the 5% to 7% range.
Passos a seguir para preparar cerveja artesanal
- Mantenha seu kit de cerveja seguro. O advento dos kits de cerveja facilitará a vida de quem experimenta fazer cerveja caseira pela primeira vez. Quando você diz kit de cerveja, isso inclui concentrado de malte e fermento. Isso também incluirá algumas orientações sobre como usar ingredientes de fermentação para fabricar cerveja. Alguns possíveis ingredientes recomendados incluem açúcar para fermentação, xarope de arroz e xarope de maltose líquido.
- Prepare beer. Brewing beer begins with sanitizing and cleaning the equipment required in the process. After the equipment is sterilized, prepare two quarts of water, heat it to about 160 degrees Fahrenheit and remove the heat. If done, add the contents of the beer kit and cook according to the set instructions. With this kit, you’ll learn that it’s best to let the ingredients dissolve before putting the lid on. Once you have done this, you need to pour the contents into the cold water in the fermenter. Mix well again and allow fermentation to proceed at the recommended temperature.
- Watch the fermentation process. This is the process of turning malt into beer. The initial stages of beer fermentation can last several days, and the key to this step is to watch the temperature . So how do you know your beer is ready to be bottled? Now there are two ways to tell if it is ready for packaging. The first is to check the bubbles coming out of the lock; if no more than one bubble bursts per minute, it means it is ready. Another test is to check for yeast. If it’s at the bottom, it’s ready for bottling.
- A última etapa é a parte de engarrafamento e vazamento. Durante o processo de inicialização, o açúcar será misturado à cerveja para estimular a fermentação. Agora transfira a cerveja para o balde de primer, acrescente o açúcar e misture. Depois disso, a cerveja está pronta para ser transferida para garrafas.