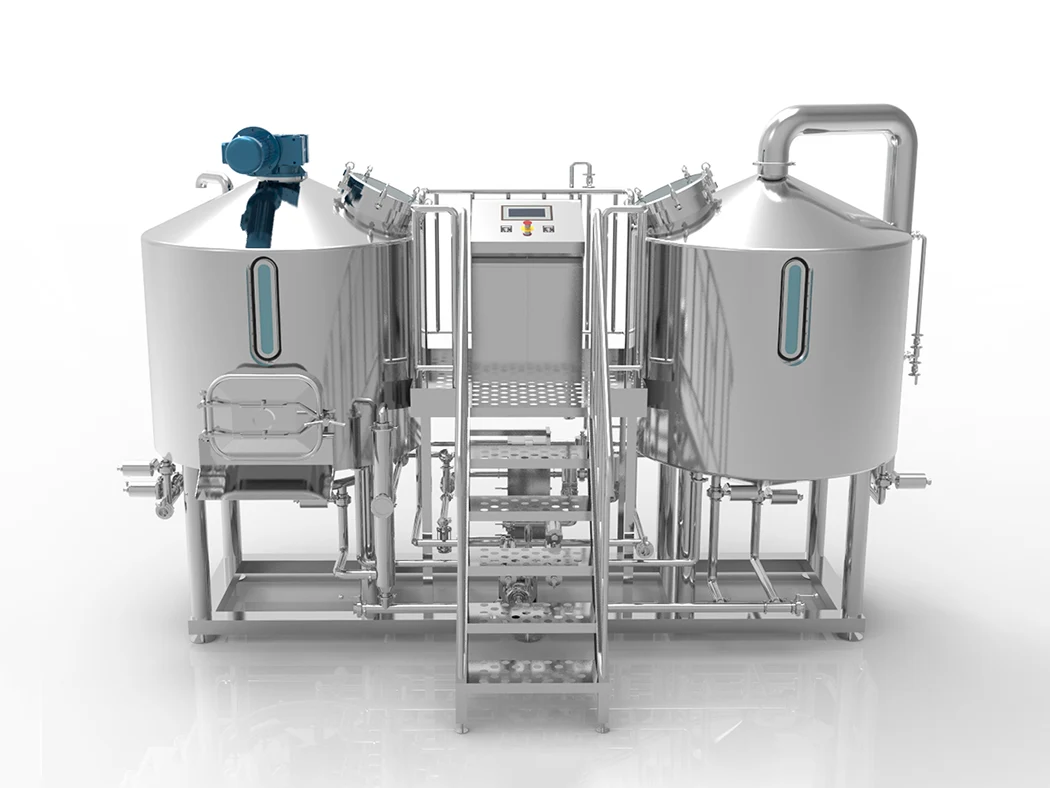
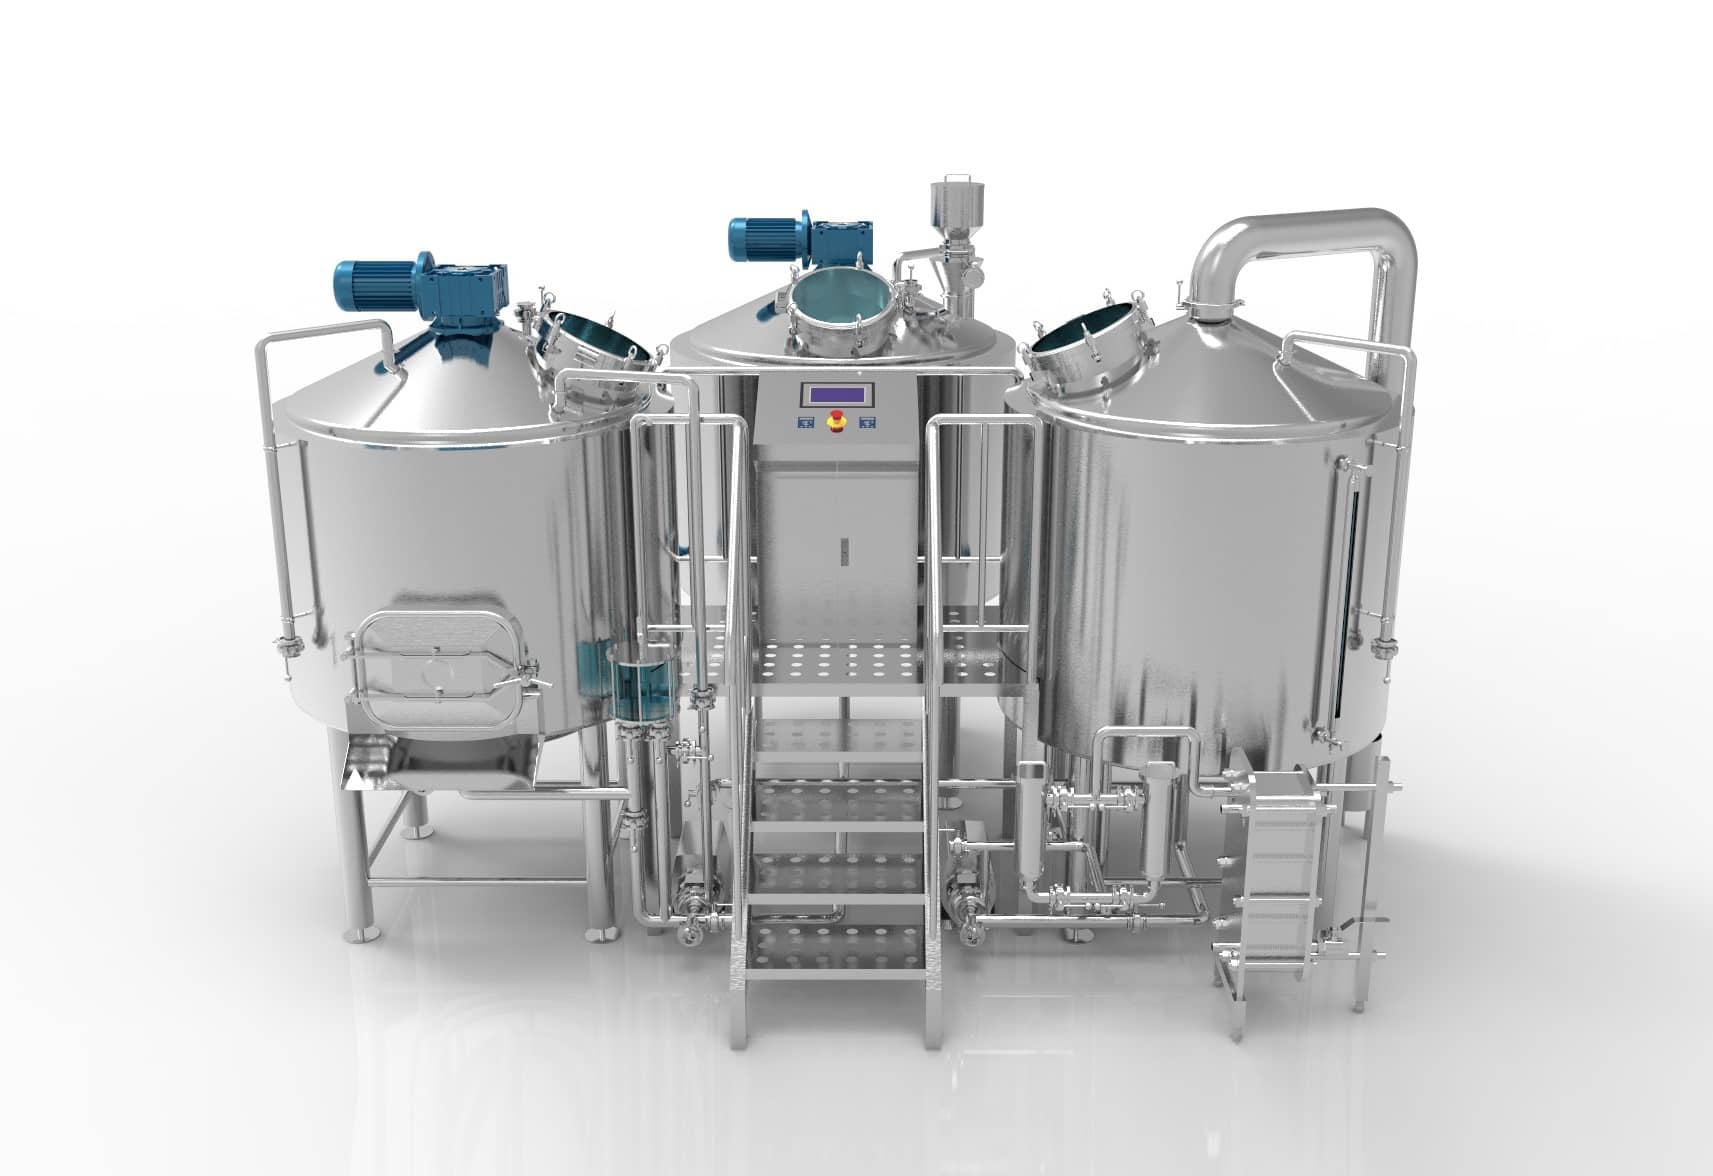
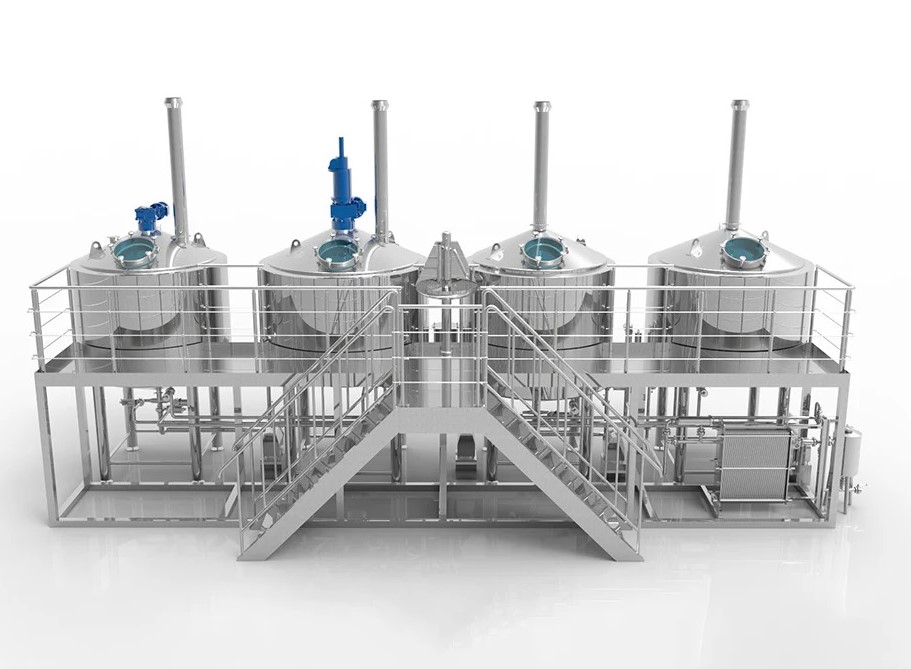

The first step to getting started with craft beer brewing is choosing to own a craft beer brewing kit. Brewing your beer at home is much easier than most people think. When you brew at home, you can create a very simple operation in a spare room of your home or your garage. The brewing equipment package you need is affordable and won’t take up a lot of space. Whether you’re a beginner or a brewmaster looking to update your brewing equipment, Micet Group has a beer-making kit to suit your experience level and interests.
クラフトビールとは何ですか?どうやって醸造するのですか?
I know this may sound basic, but to be a craft brewer we need to understand the most basic craft. Craft beer is composed of 4 ingredients – water, malt, hops and yeast.
クラフトビール醸造の初心者ガイド:
- 食材の準備や道具の準備(掃除)はお客様が行います。
- 材料を加えて混ぜる
- 酵母を加える
- ビールを約14日間発酵させます
- ビールの準備ができているかどうかをテストする
- ビールの瓶詰め
- 醸造したバッチをお楽しみください。
- 洗浄・消毒設備
The beer brewing process for beginners can take about 21 to 28 days, depending on the style of beer. you’ll need about 20 minutes to combine the ingredients and then let them soak for about seven days. After that, the beer is bottled (which takes about 40 minutes) and allowed to ferment. Once the beer has been in the bottle for two weeks, you can chill it and enjoy it.

初心者がビールを醸造するために必要なスターターキットは何ですか?
スターター キットには、発酵バケット、瓶詰めバケット、瓶詰めワンド、キャッパー、自動サイフォン、移送チューブ、比重計、エアロック、消毒液が含まれている必要があります。醸造キットの他に、醸造に十分な大きさのポット/ケトルとプロパンバーナーも必要です。キッチンコンロを使用する人もいますが、7~8ガロンのやかんを入れるのに十分な大きさではないかもしれません。デジタル温度計も便利で、浸漬温度とピッチング温度を測定するのに必須です。クラフトビールの醸造を始める前に、適切なビールの設備と材料を用意する必要があります。初心者向けのビール醸造の重要なポイントは次のとおりです。
- ビールキット
- 4+ガロンポット
- 発酵タンク
- エアロックまたはプラグ
- 棚杖・自動サイフォン
- 瓶詰めスティック
- 温度計
- デジタルスケール
- PVCパイプ(3/8インチビールパイプ)
- ボトル
- ボトルキャップおよびキャッピングマシン
- 洗い流さないクリーナーと食品グレードの消毒剤
For your first time brewing beer at home, a starter kit is the right choice because it comes with all the equipment and ingredients you need to brew your first batch of beer. We don’t recommend all-grain brewing for beginners, as things like partial mashing and all-grain brewing need more advanced techniques.
自家醸造初心者のためのビールキットに関するアドバイス
ミセット氏は、醸造において、新しい自家醸造者にとって役立つことがいくつかあると考えています。参考までにいくつかの提案を示します。
- Kettle: Like many winemakers, buy a starter equipment kit. Once you have it, all you need is a brewing kettle and ingredients, and you’re ready to brew.
- モルトクーラー: ビール汚染の可能性を減らす最良の方法の 1 つは、麦汁をできるだけ冷却し、有害な細菌が好む危険な範囲外に温度を下げることです。多くの新しい自家醸造者は、大きな浴槽や浴槽の氷浴に醸造ポットを浸してこれを行います。麦汁クーラーを購入することで、時間を大幅に節約し、手間を省き、汚染のリスクを減らすことができます。
- 自動サイフォン: ケトルからメイン発酵槽に移す場合でも、ラックから樽に移す場合でも、自動サイフォンが主なツールです。ほとんどのエントリーレベルの醸造セットアップには、5/16 インチの自動サイフォンが含まれています。購入する場合、通常は $10 程度の費用がかかります。
- サワードウスターター: イーストのチューブ、イーストのパケット、ドライイーストのパッケージのいずれを購入する場合でも、サワードウスターターを作ることは、発酵サイクルを確実に良好に開始するための優れた方法です。完了までにかかる時間はわずか約 20 分で、強力で活発な一次発酵段階を迎える可能性が高まります。また、酵母が健康で豊富であれば砂糖がより早くアルコールに変換されるため、汚染の可能性も低くなります。
- 麦汁の酸素化: 高温段階が完了し、麦汁が冷却されると、酵母が活発な発酵を開始するために必要な酸素がほとんど残りません。
- Use a blow tube: Using a blow tube instead of an airlock doesn’t mean your beer won’t taste great. It means there won’t be any mess on your hands. Place one end of a tube into the top of the plug and dip the other tube into the disinfectant, and you’re good to go. Some Clawson may get into your solution bucket through the tubing, so it’s not a bad idea to check and replace the sanitizer a few times a day.
- Mash Bag: Without a mash tun, they couldn’t start brewing all-grain beer. Incorrect! If you have a quality sleeping bag, place the mash in a brew kettle (heat it!) and wrap it in the sleeping bag for 60 minutes. You’ll be surprised at how well the temperature is maintained. Check after about 15 minutes and add boiling water if you need to raise the temperature.

初心者のための醸造のための 5 つの重要なステップ
自家醸造はお金を節約し、さまざまな種類のビールを楽しむ楽しい方法です。最初のビールを醸造する前に、設備が必要です。自家醸造事業の開始時に適切な機器に投資すると、多くの頭痛、フラストレーション、無駄な材料を節約できます。
- 清潔に保つ: 自家製ビール醸造者にとって最も重要なルールは、特に冷却プロセス中の衛生です。麦汁を冷却して汚染のリスクを軽減する、掃除が簡単なコイル浸漬クーラーを販売します。
- イーストを準備する : まず、イーストを冷蔵庫に何ヶ月も放置しないでください。第二に、酵母がその仕事をするために適切な量の栄養素と酸素を提供する必要があります。酵母が満足していれば、より良いビールが得られます。
- コンロから遠ざける:沸騰するとキッチンが混乱する恐れがあります。代わりに、ビールを加熱できるプロパンバーナーとパティオ、ガレージ、または私道のスペースを使用し、ケトルを沸騰させたりホップを追加したりするときにホースまたはスプレーボトルを準備してください。
- Buy a glass fermenter: Plastic fermenters are fine and work, but glass fermenters last longer, don’t leak, and are easier to sterilize.
- Alcohol content: Managing the higher gravity fermentation of stronger, higher alcohol content beers can be tricky when you’re starting out. If it’s too light, there’s less room for error because there’s no place to hide any flaws. Beginners should keep alcohol content in the 5% to 7% range.
クラフトビールを醸造するための手順
- ビールキットを安全に保管してください。ビールキットの登場により、初めて自家醸造に挑戦する人にとっては作業が楽になります。ビールキットという場合、これには濃縮麦芽と酵母が含まれます。これには、ビールを醸造するために発酵成分を使用する方法に関するガイダンスも含まれます。推奨される材料としては、醸造用砂糖、米飴、麦芽糖水飴などが挙げられます。
- Prepare beer. Brewing beer begins with sanitizing and cleaning the equipment required in the process. After the equipment is sterilized, prepare two quarts of water, heat it to about 160 degrees Fahrenheit and remove the heat. If done, add the contents of the beer kit and cook according to the set instructions. With this kit, you’ll learn that it’s best to let the ingredients dissolve before putting the lid on. Once you have done this, you need to pour the contents into the cold water in the fermenter. Mix well again and allow fermentation to proceed at the recommended temperature.
- Watch the fermentation process. This is the process of turning malt into beer. The initial stages of beer fermentation can last several days, and the key to this step is to watch the temperature . So how do you know your beer is ready to be bottled? Now there are two ways to tell if it is ready for packaging. The first is to check the bubbles coming out of the lock; if no more than one bubble bursts per minute, it means it is ready. Another test is to check for yeast. If it’s at the bottom, it’s ready for bottling.
- 最後のステップは瓶詰めと注ぐ部分です。始動プロセス中に、発酵を促進するために砂糖がビールに混合されます。ビールをプライマーバケツに移し、砂糖を加えて混ぜます。この後、ビールをボトルに移す準備が整います。