Best Brite Beer Tanks for Nano Breweries & Microbreweries (2025 Buyer’s Guide)
29 Jul
Fermenters are full, carbonation is inconsistent, and clear beer waits while cash flow stalls. Painful? A properly sized, jacketed, sanitary brite tank frees your fermentation tank, speeds maturation, and lifts yield—so every batch hits taps or cans on time.
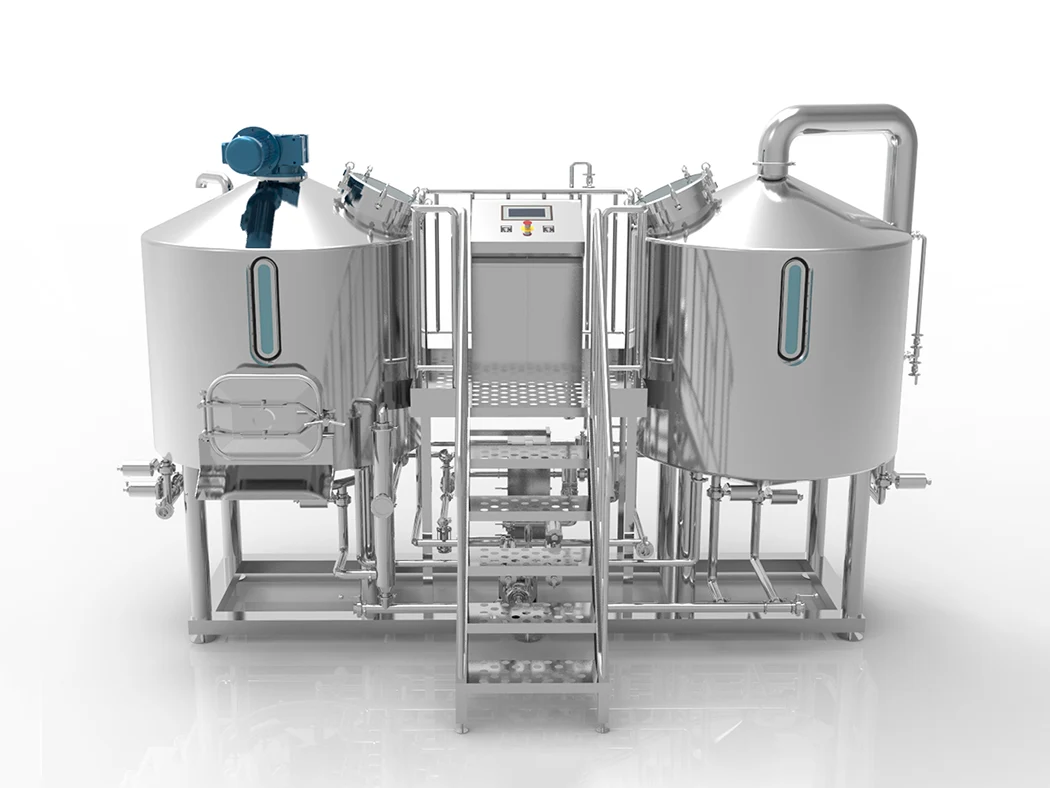
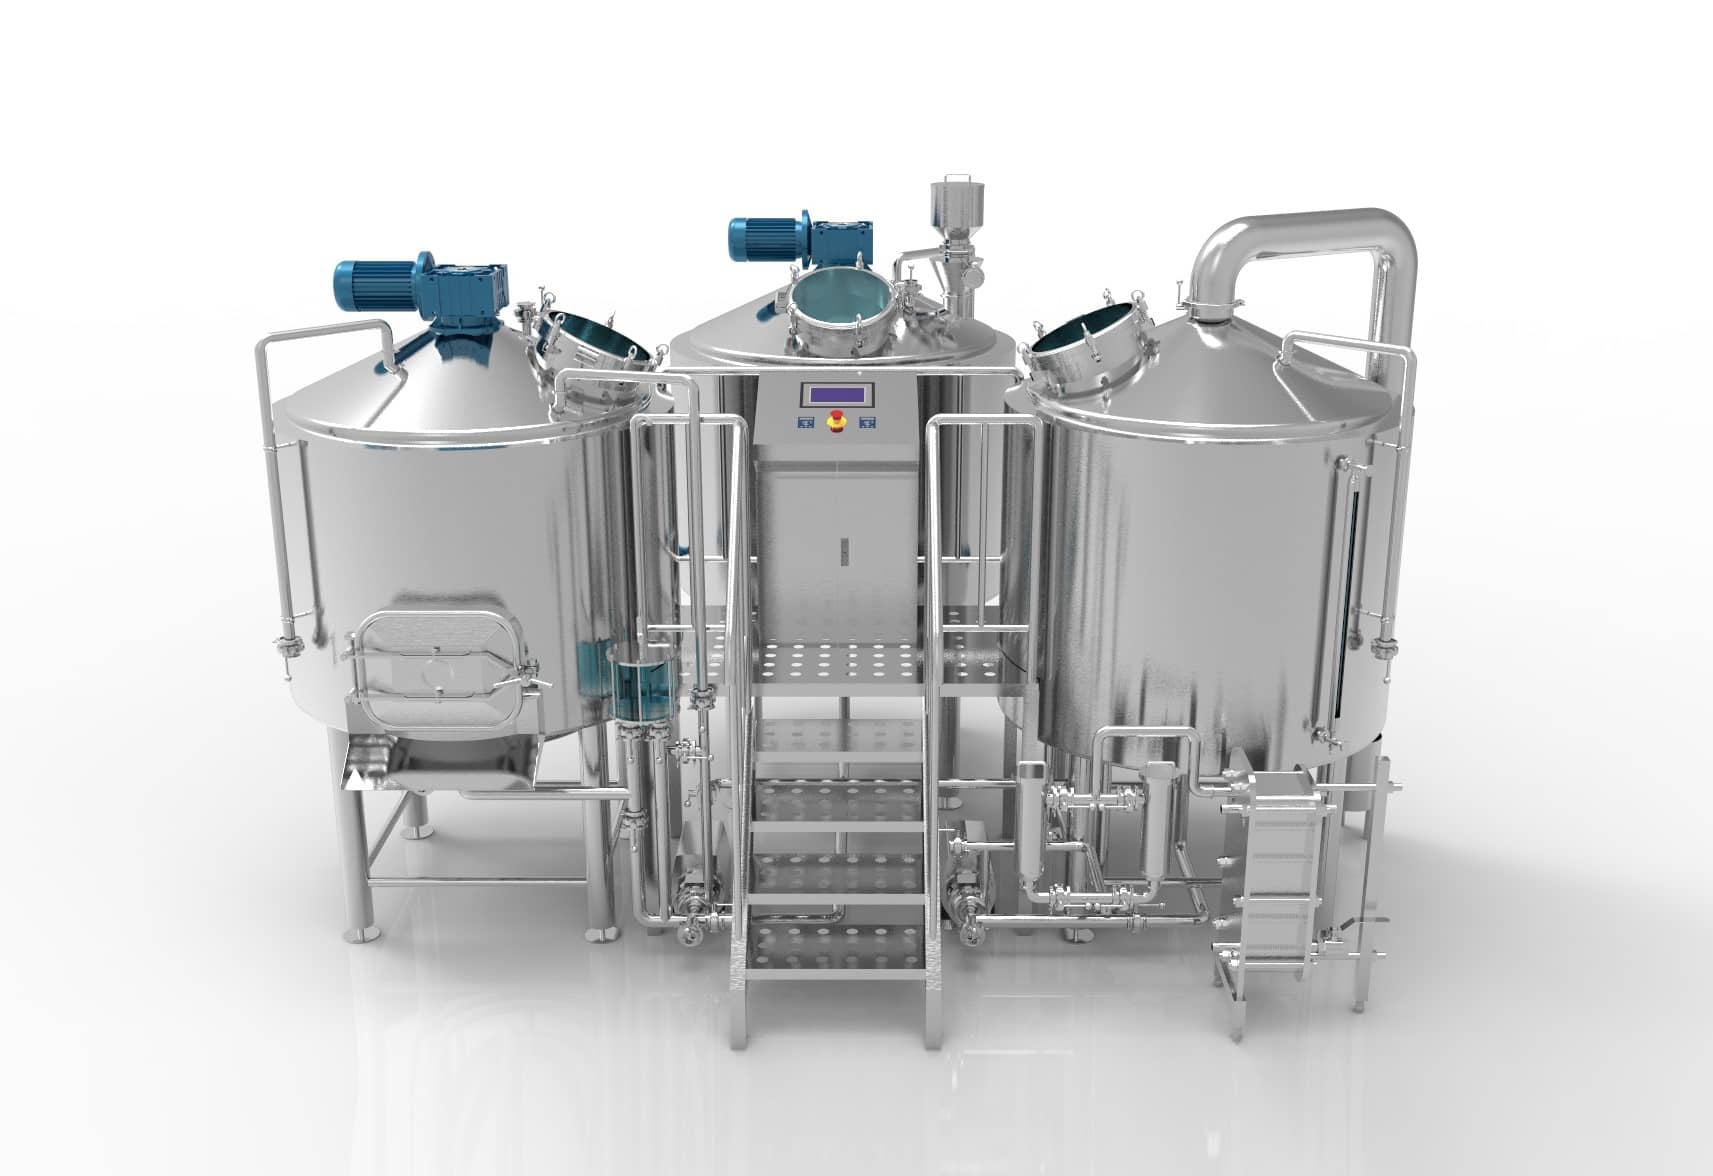
A brite (bright) beer tank is a stainless steel, glycol‑jacketed vessel used after fermentation to clarify, carbonate, and store clear beer before packaging or serving. For nano breweries and microbreweries, the best tanks balance volume (3.5–15 bbl), pressure rating, CIP simplicity, and ROI—helping you turn batches faster without flavor loss.
1. What is a brite beer tank and why does a nano brewery truly need one?
A brite beer tank—also known as a bright beer tank or simply bright tank—is the polishing step after fermentation. Once your fermenter finishes attenuation, you transfer beer into this pressure-rated vessel to cold‑condition, clarify, and carbonate. Tanks are often straight‑walled and fitted with a carb stone, sample valve, and sight glass to control carbonation and clarity precisely.
What is a brite beer tank
From a brewing equipment manufacturer’s view, nano operations survive on throughput. Keeping beer in a fermentation tank for conditioning blocks your next batch. With a separate bright beer tank, you crash, carb, and hold clear beer while your fermenter gets cleaned and filled again. More brews, less idle time and labor, better ROI.
Explore bright beer tank options and specs right here: bright beer tank.
2. Bright beer tank vs. fermentation tank: which vessel does what (and when)?
A fermentation tank (conical fermenter) is built for active fermentation: yeast growth, blowoff, trub separation, and temperature control during vigorous metabolization. A brite beer tank is the finishing room—smooth interior, fewer fittings, a carbonation stone, and a pressure rating for holding finished beer.
Quick comparison:
Function:
Fermentation tank = ferment (primary/secondary), yeast cropping.
Brite tank = clarify, carbonate, store clear beer.
Geometry:
Fermenter = conical bottom for yeast harvest.
Bright tank = straight cylinder for easy CIP and uniform cooling.
Process timing:
Ferment first, transfer, then polish in brite.
Tanks are often paired—one ferments while the other conditions.
Yes, unitanks combine both jobs, but dedicated vessels give flexibility. Need to push a double batch through the kettle? Let the fermenter reload while beer rests in the BBT. That’s how nano breweries hit consistent schedules without sacrificing quality.
Want to compare fermenter styles too? Check beer fermenter tank range: beer fermenter tank.
3. How to size a brite tank for a 3.5 bbl, 5 bbl, or 10 bbl batch in a microbrewery?
Start with your batch size—and your ambition. For a 3.5 bbl brewhouse, a 5–7 bbl brite tank gives headspace for forced carbonation and occasional blending. A 5 bbl system pairs nicely with a 7–10 bbl bright tank, while 10 bbl brewhouses often jump to 15 bbl to hold a double batch.
Brewhouse Size
Typical Fermenter (bbl)
Suggested Brite Tank (bbl)
Why It Works
3.5 bbl
4–5
5–7
Headspace for CO₂ + clear beer draw-off
5 bbl
7
7–10
One-to-one transfer + serving buffer
10 bbl
10–15
15
Double batch, lager maturation room
Remember the glycol math: more surface area (jackets) means more BTU load on your chiller. Undersized chillers struggle to crash or hold lager temps. Oversize slightly to avoid warm beer during busy weeks.
4. Key specs that matter: pressure rating, glycol jacket zones, CIP, and sanitary fittings
Here’s the checklist every brewer should tick before ordering:
Pressure rating (2–3 bar) – Enough for forced carbonation and pushing beer to a filler or tap without a pump.
Glycol jacket zones – Separate upper/lower jackets keep temperature uniform and avoid icing coils.
CIP capability – A fixed spray ball, smooth sanitary (tri‑clamp) ports, and polished welds slash cleaning time.
Instrumentation – Carb stone, sight glass, sample valve, PRV, and accurate pressure/temperature gauges.
We fabricate our stainless steel tanks (SS304/316) with mirror‑polished interiors, because sanitary welds and smooth walls make CIP faster and safer. Add a bottom drain for yeast/protein purge, and you’ll cut time and labor every week.
5. Carbonation, clear beer, and maturation: dialing in sparkle without stripping flavor
Carbonation = control. Inject CO₂ through a sintered carb stone at low flow, watching pressure and temperature. Warmer beer absorbs gas slower; colder beer takes it faster but risks over-carbonation spikes. For most craft beer styles, target 2.4–2.7 vols CO₂; for stout you may drop to ~1.8–2.0, while a crisp lager often sits around 2.5.
Purge the tank with CO₂ to near-oxygen-free (<50 ppb O₂ if you can measure).
Transfer from the fermenter gently—closed-loop if possible—to protect aroma.
Crash and hold: 0–1 °C for 24–48 hours to drop yeast and proteins.
Carbonate slowly: watch PSI rise, bleed off excess, and verify with a Zahm & Nagel or inline meter.
Sample & taste: clarity is visual, but flavor and mouthfeel confirm readiness.
“Clear beer without soul is pointless. Carbonation should lift aroma, not scrub it.” — one experienced brewer we equipped last year.
Maturation matters: Even after fermentation stops, flavor continues to round. That short rest in the brite tank is true maturation—smoothing hop burn in a hazy IPA, polishing sulfur out of a lager, or letting roast settle in a stout. Get clear beer without stripping character.
dialing in sparkle without stripping flavor
6. Can a bright tank double as a serving tank for brewpubs and nano operations?
Yes—serving tanks (often the very same brite tanks) can feed your taps directly. This is common in brewpubs and small microbrewery pubs:
Pros: Fewer kegs to wash, lower O₂ pickup, steady carbonation.
Cons: The tank is tied up while serving; you need solid cold-hold and insulation.
Draft-line best practices:
Run short glycol-jacketed lines to the bar to prevent foamy pours.
Install PRVs and flow-control valves to keep pressure stable during busy service.
Schedule CIP immediately after the tank empties—don’t let beer stone harden.
If you run weekend taproom rushes, dedicate Friday–Sunday to serving from the BBT, then Monday morning transfer leftovers to kegs, CIP, and reload for the next batch.
Compare sizes and options for serving-ready bright tanks here: bright tanks.
7. Cost, ROI, and yield: what a brewery owner should expect to invest—and recover
A 5 bbl brite tank typically costs USD $4,000–$7,000 (ports, finish, pressure rating affect price). For 10 bbl tanks, think $7,500–$11,000. Add carb stones, sample ports, sight glass, and consider a larger glycol chiller if you’re boosting total jacket area.
Where ROI appears:
Yield: Pulling beer from a flat-bottom bright tank leaves less behind than a conical; a 1–3% gain per batch is common.
Time & labor: Faster CIP cycles, less kegging, and shorter tank turns free staff hours.
Throughput: Releasing the fermenter faster means more brews per month.
Factor
Example Value
Annual Impact (5 bbl system)
Beer loss reduced
2% of 5 bbl × 50 batches
≈5 bbl/year saved
Labor saved
0.5 hr/batch CIP × 50
25 hours/year
Extra batches
1 added batch/month
12 more batches
Even conservative math shows a bright beer tank paying for itself in 12–18 months. And the intangible: consistent quality builds brand loyalty.
Ready for numbers on fillers too? See our beer keg filling machine options: beer keg filling machine.
8. Space planning, workflow, and chiller load: integrating the tank into your brewing system
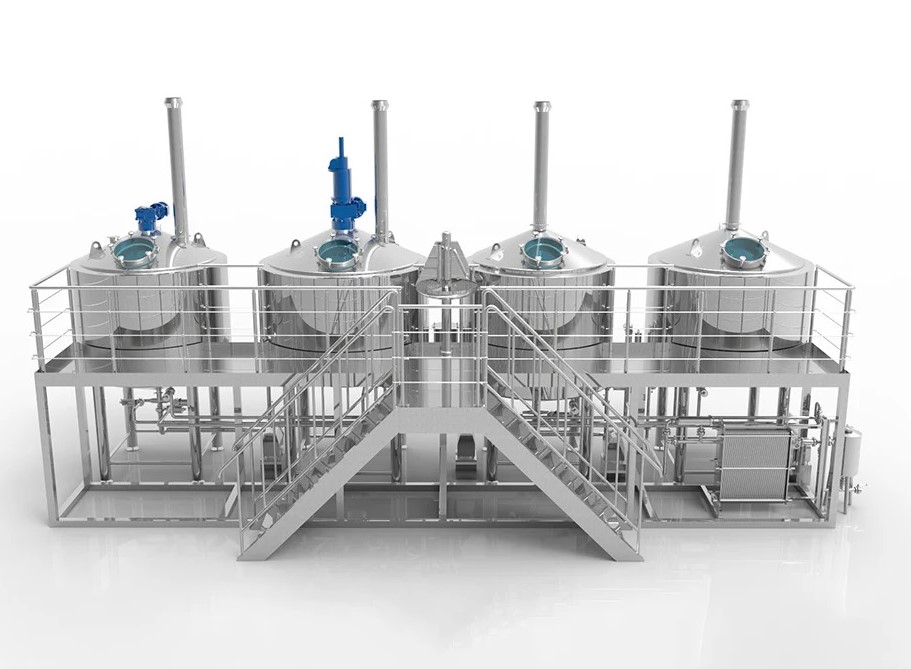
Your brewing system is a pipeline: mash → kettle → fermenter → brite → packaging. Layout decides how smooth that pipeline runs.
Space & workflow tips:
Shortest path wins: Put the bright beer tank near your canning or kegging station to reduce hose length and O₂ risk.
Ceiling clearance: Pressure relief valves (PRVs) need headroom; don’t trap them under beams.
Glycol & chiller considerations:
Calculate BTU load: around 1,000–1,200 BTU/hr per bbl for rapid crash cooling.
Add a safety margin if you’ll crash multiple tanks simultaneously.
Insulate lines well; warm glycol loops are wasted energy and sluggish chilling.
Planning a full upgrade? Explore all in one beer brewing system packages: all in one beer brewing system. Looking at wine, cider, or kombucha too? Our stainless steel kombucha fermenter line uses the same sanitary principles: stainless steel kombucha fermenter.
9. Lager vs. hazy IPA vs. stout: style‑specific conditioning tank tactics
Lager: Slow and cold. Hold the beer in the brite tank near 0 °C for a longer maturation phase (maturation truly happens here). Keep pressure modest so you don’t over-carbonate; a crisp lager benefits from a tight CO₂ range and plenty of time to let sulfur volatilize. Because lager yeast flocculates well, clarity comes fast—great for clear beer targets.
Hazy IPA: Oxygen is the enemy. Purge every line, clamp, and carb stone with CO₂. Transfer gently to avoid shredding hop oils. Carbonation should be gradual—short bursts at lower PSI—so you don’t strip aroma or push hop burn back into solution. Crash just enough to drop proteins without destroying haze stability. Taste daily.
Stout (and other high-viscosity beers): Thick beer absorbs gas slowly. Use slightly warmer conditioning (2–3 °C instead of near-freezing) and give CO₂ more contact time. Check head pressure often—if foam builds in the stone line, pause and bleed it off. Dark malts hide clarity issues, but protein residue still clogs CIP equipment, so clean right after emptying.
Style SOPs save time and labor: write a one-page sheet per flagship beer (IPA, lager, stout) and tape it near the tank. Staff repeats success, not mistakes.
A variety of beers
10. Future‑proofing your cellar: unitanks, bbl tanks, and when a dedicated bright tank wins
Early on, unitanks feel like the perfect “right equipment”: one shell to ferment and condition. But as production grows, separation is freedom. A dedicated bright tank lets you crash, carb, and package while the fermenter refills with the next mash.
Decision points for upgrading:
Throughput pain: Are fermenters sitting with finished beer? Time to add a brite tank.
Double batch goals: If your kettle can double, your cellar should hold that volume too.
Packaging schedule: If canning/kegging happens twice a week, an extra bright tank avoids late-night transfers.
Mixing products: Want to enter the kombucha or cider game? A second stainless steel conditioning tank prevents cross-flavor.
Standardized bbl tanks (7, 10, 15) simplify ordering, fittings, and spare parts. When you finally jump to commercial breweries scale, modular manifolds and skidded CIP carts plug straight into the layout you already built.
11. Scaling from homebrewing to commercial breweries: safety, sanitary design, and SOPs
The leap from homebrew to selling pints demands more than bigger kettles. Pressurized tanks require PRVs, calibrated gauges, and documented SOPs. Sanitary welds, tri-clamps, and CIP spray balls aren’t luxuries—they’re how you prevent infections and protect staff.
Key scaling tips:
Document everything: Transfer procedures, carbonation targets, CIP chemical concentrations.
Train staff on pressure: Never crack clamps under pressure; always vent first.
Design for cleaning: Polished interiors and proper drains cut turnaround.
Buy for flexibility: Ports for kegging, carb stones, and sample valves cost little now, save retrofits later.
As a brewing equipment manufacturing plant, we customize port positions, jacket coverage, and control panels so your learning curve isn’t paid for in lost beer. A clear plan turns “nano operations” into a sustainable small brewery with real ROI.
Do I really need a separate brite tank if I already have unitanks? Not mandatory, but a dedicated bright beer tank increases throughput and simplifies carbonation and polishing. You free your fermenter faster and reduce scheduling conflicts.
How long should beer stay in the bright beer tank? It depends on style and clarity goals. Many nano breweries hold beer 24–72 hours; lagers or sulfur-heavy ales might rest longer for flavor smoothing (maturation).
What PSI should I carbonate at? Start low (5–8 psi) and step up slowly while monitoring temperature. The colder the beer, the faster it absorbs CO₂—watch for overshoot.
Can I push beer from the brite tank straight to cans without a pump? Yes, if the tank is pressure-rated and your filler can accept pressurized beer. Keep lines short and purged with CO₂ to avoid oxygen pickup.
What’s the best way to avoid oxygen when transferring to the brite tank? Closed-loop transfer, fully purged hoses and tank, and CO₂ blankets on both sides. Even small O₂ pickup can dull hop aroma or stale malt notes.
How do I know if my chiller can handle another jacketed tank? Sum the BTU load of all tanks you might crash at once. If the number approaches or exceeds your chiller’s rated capacity, upgrade or stagger crashes.
Key Takeaways (Bullet Summary)
A brite beer tank polishes, carbonates, and stores beer post-fermentation, freeing up the fermenter for the next batch.
Size the tank for current batches and future double batches (e.g., 3.5 bbl brewhouse → 5–7 bbl bright tank).
 1")
 2")
 3")