
You want to scale from taproom hits to consistent distribution. But capacity bottlenecks, uneven batches, and clunky clean-downs eat your profit. A modern brewing system streamlines the work so your team can brew more, waste less, and grow faster.
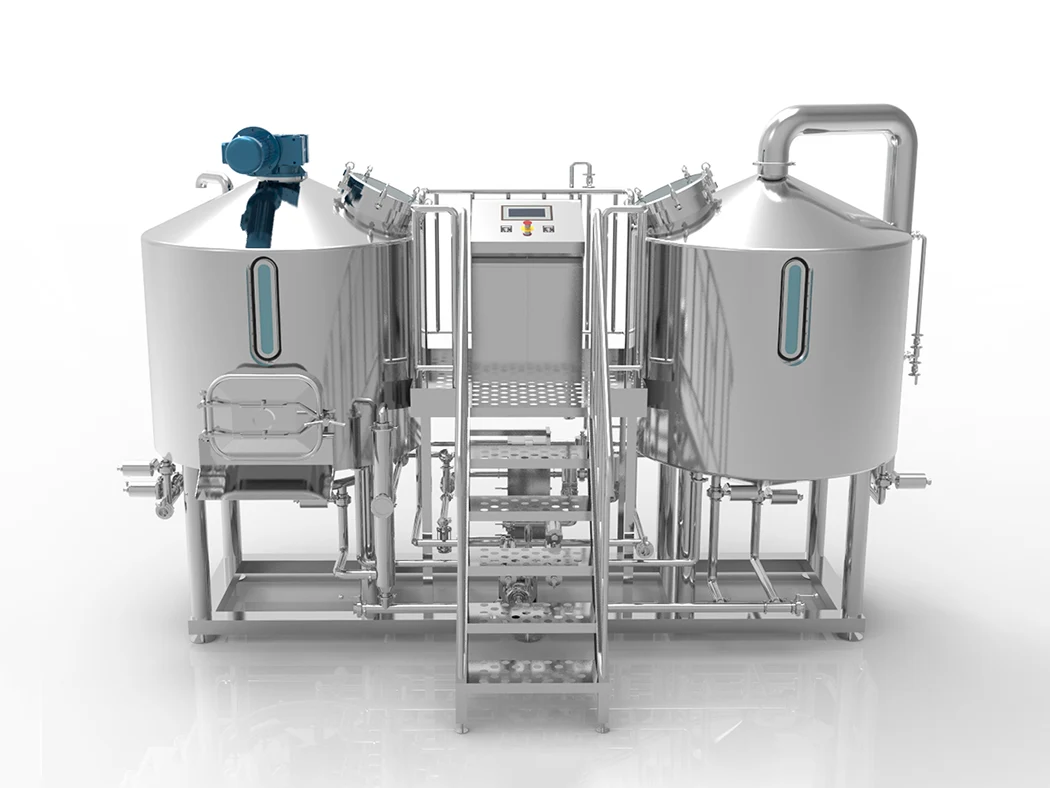
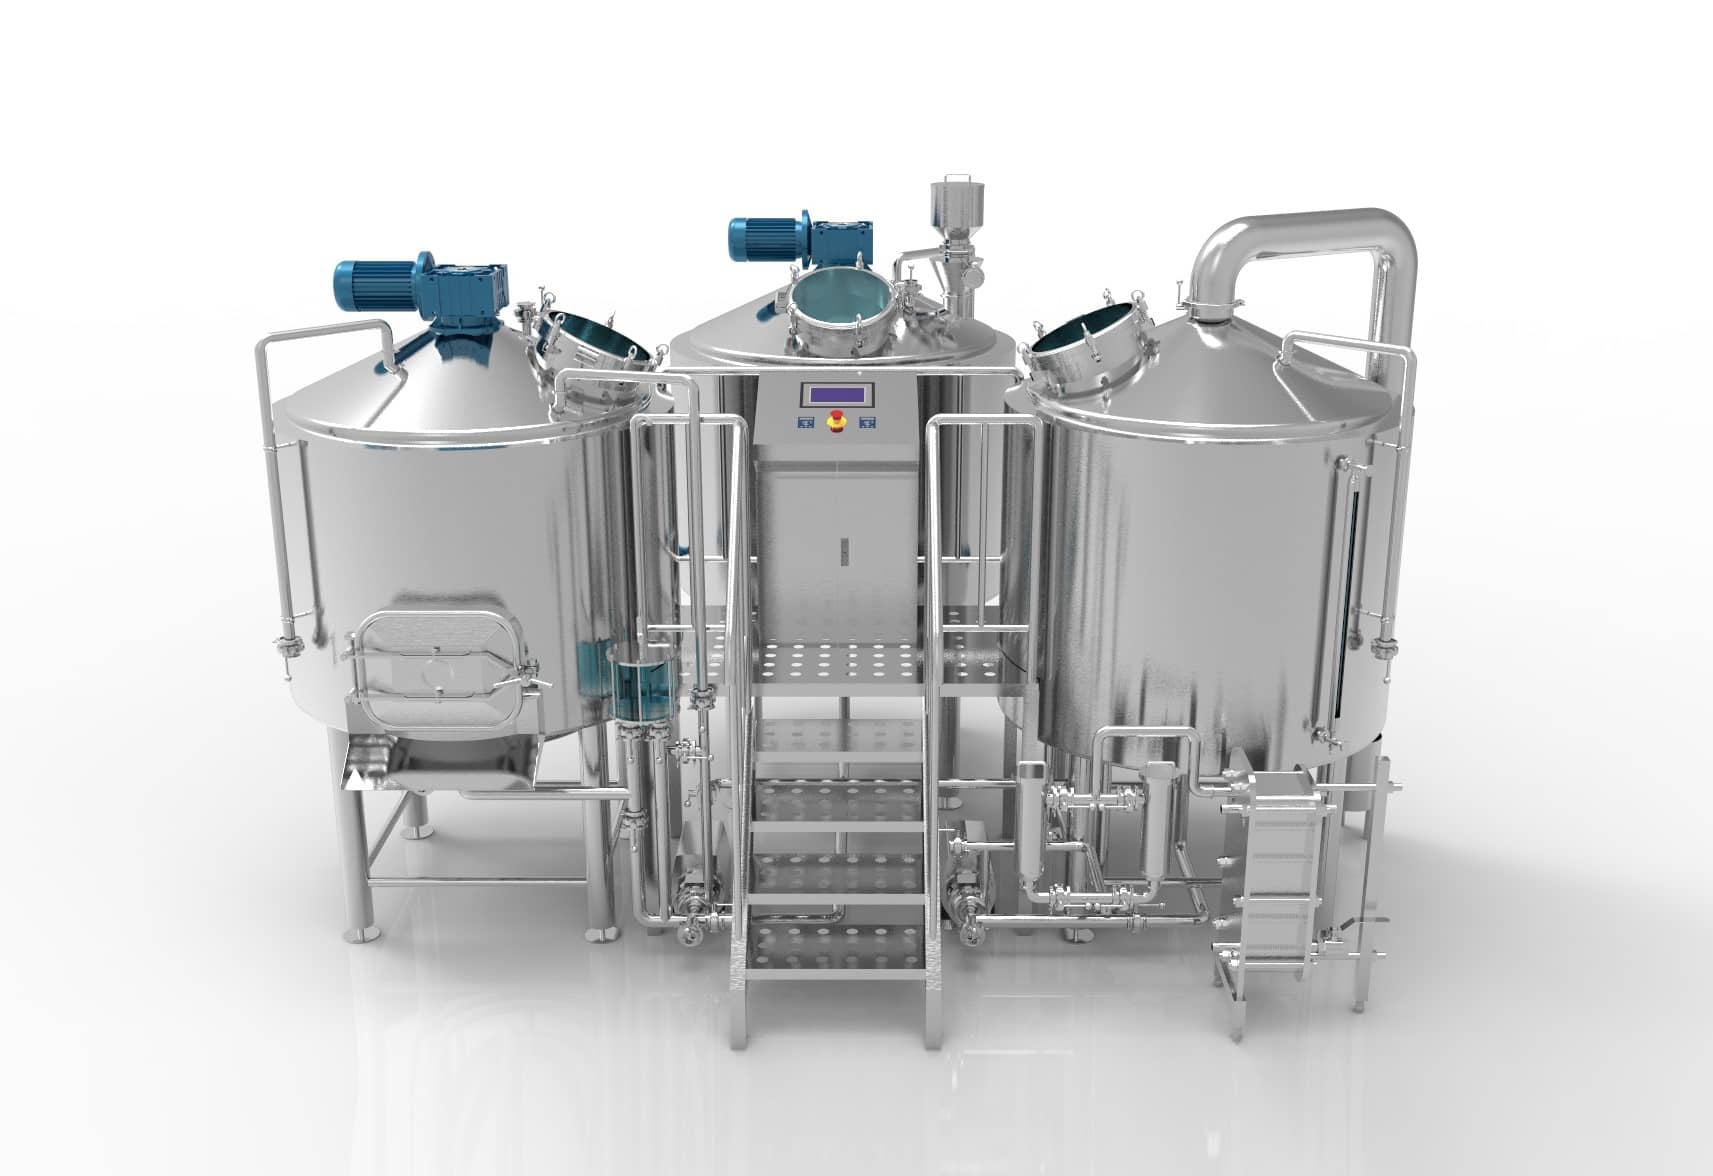
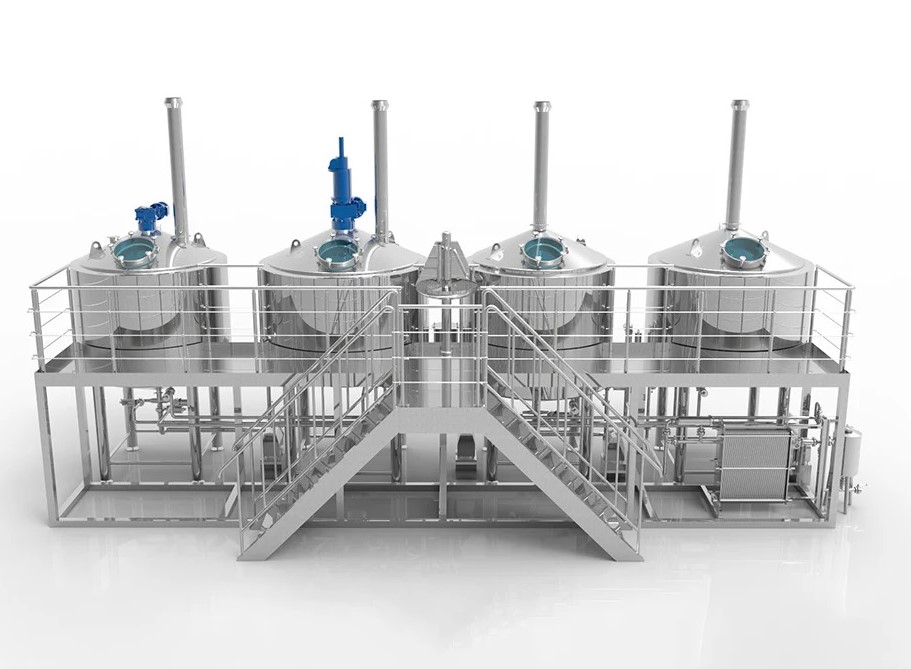
Commercial brewing systems are integrated brewhouse and cellar packages—mash tun, kettle, transfer, fermenter, controls, and utilities—engineered for consistency and efficiency. They standardize the brewing process from mash to whirlpool, improve sanitation, and give pro-level control over wort, temperature, and packaging so you can scale quality and output reliably.
Outline
- What is a commercial brewing system?
- Inside the brewhouse: mash, lauter, kettle, whirlpool, wort
- Sizing by bbl (from 3.5 bbl upward) and capacity planning
- Cellar choices: conical fermenter, unitank, fittings, and controls
- Heating options (steam, direct-fire, electric brewing)
- Utilities & layout: hot liquor, heat exchanger, wort chiller, wort pump, grain handling
- CIP & sanitation: clean fast, avoid contamination
- Fermentation control, yeast health, and QA to brew exceptional beer
- Packaging: brite tank, “brite” service, and keg workflows
- Cost & ROI: labor, utilities, and batch economics (with table)
- Brands & build quality: where Blichmann/Anvil fit—and when you need pro gear
- Why choose a turnkey brewing system (with helpful internal links)
What is a commercial brewing system?
A commercial brewing system is a coordinated set of vessels, pumps, valves, piping, and controls designed for repeatable, food-safe production. It pairs a brewhouse (where you convert grain to wort) with a cellar (where you ferment and condition beer in a tank). Together, they reduce variability and improve throughput so your brewery can meet demand without sacrificing quality.
The system’s job is simple: remove guesswork. A well-engineered package stabilizes temperatures in the mash tun, speeds lautering, moves wort gently, and holds fermentation targets. Sensors, VFDs, and programmable steps help your brewer hit specs every brew day—so customers get the same pint every time.

How does the brewhouse work (mash, lauter, kettle, whirlpool)?
Think of a brewhouse as a craft kitchen. In the mash, you hydrate milled grain in the mash tun to convert starch into sugars. Rakes and jackets keep the bed uniform so you extract evenly. Then you lauter—separating sweet wort from grain while limiting shear. A well-set bed shortens run-off and minimizes astringency.
Next, the kettle boils to sterilize, drive off volatiles, and isomerize hops. Flow then enters whirlpool where a tangential inlet cones trub so you can draw bright wort to the heat exchanger. Attention to shear, flow-paths, and tri-clamp seals preserves foam-positive proteins and reduces pick-ups before the cellar.
“Brewhouses that guide temperature profiles and flow consistently make training easier and results more predictable.” — Head brewer, taproom & distro
Sizing, bbl, and when 3.5 bbl makes sense
Capacity is usually expressed in bbl (barrels; 1 bbl = 31 U.S. gallons). Many startups launch with 3.5 bbl to test market fit, then scale to 7–15 bbl for steady taproom plus wholesale. Your batch size should match tank turns and cold-side capacity, not just hot-side ambition.
Typical capacity ladder
| Brewhouse (bbl) | Ideal Output / Week | Notes |
|---|---|---|
| 3.5 | 1–3 turns | Pilot, nano, festivals, rapid iteration |
| 7 | 2–4 turns | Taproom + light distro |
| 10–15 | 3–6 turns | Multi-brand, seasonal, flagships |
| 20–30 | 4–8 turns | Packaging line alignment, wholesale growth |
Right-sizing lowers COGS. Undersized systems force double-shift days; oversized systems hurt cash flow. Align brewhouse to cellar (fermenter/unitank) volume and packaging cadence.
Size and spec a starter platform with our nano brewery equipment guide for agile launches and pilots.
Cellar choices: fermenters, unitanks, fittings, and control
In the cellar, stainless steel conicals provide headspace and geometry for quick yeast drop. A conical fermenter with 60–70° cone helps harvest, dump trub, and clarify efficiently. For flexibility, a unitank (pressure-rated) lets you ferment, crash, and carb in one tank, trimming transfers and oxygen risk.
Pay attention to ports and fittings. 1.5″ tool-less tri-clamp ferrules speed hop doses, sampling, and purges. Dedicated spools for dry hop, spunding, and an in-line oxygenation kit enhance dissolved O₂ control before pitch. Add jackets and temperature control loops so the fermenter holds setpoints through vigorous fermentation.

Heating options: steam, direct-fire, or electric?
Steam shines for step-mashing and tight ramp control. Direct-fire can be cost-effective at small sizes, but require careful combustion design. Electric brewing is clean and quiet, ideal for urban spaces with power capacity and emissions rules. Whatever you choose, size the burner or elements to reach boil in a reasonable window while keeping caramelization in check.
Good build quality reduces long-term costs: thicker shells, clean welds, and polished stainless interior surfaces improve durability and cleaning. Insulation lowers energy use and protects staff.
Utilities & layout: hot liquor, heat exchanger, wort chiller, pump, and grain handling
Utilities make or break your day. A hot liquor tank (HLT) stabilizes strike/sparge temps and slashes heat-up time between turns. A two-stage heat exchanger (city water + glycol) drops wort to pitch temp quickly, while a dedicated wort pump preserves gentle laminar transfer.
Upstream, a malt scale and grain mill with consistent crush feed the mash. Use grist hydrators and under-let to avoid dough balls, then sparge evenly to keep run-off clear. Specify ergonomic platforms and hose drops so crews move safely between mash tuns and vessels without kinks or trip points.

CIP & sanitation: clean fast, avoid contamination
Fast, reliable cleaning is non-negotiable. A dedicated CIP cart, spray balls, and reclaim loops shorten turn-around while saving water and chemicals. Proper sanitation requires time, temperature, and turbulence—verify all three. Keep a tight gasket program, and rotate cleaning equipment so every line sees detergent and sanitizer at spec.
Design to prevent contamination: purge lines with CO₂ before cold-side transfers, minimize dead legs, and keep sight glasses shaded. Validate with ATP swabs and regular plate counts—small checks prevent big losses.
Fermentation control: yeast health and quality you can taste
Healthy yeast is your best insurance policy. Oxygen appropriately with your in-line oxygenation kit, pitch by cell count, and control exotherm with balanced jackets. Harvest at peak vitality, store cold, and repitch with measured generations. Doing so helps you brew exceptional beer with bright aromatics and repeatable attenuation.
QA starts early: record pH in mash, gravity in the kettle/lauter run-off, and DO on transfers. Cold-crash, fine, or filter as your style demands—and log everything. When the team sees trends, they fix problems before customers taste them.
- Compare cellar options on our beer fermenter & bright tank page to match styles and throughput.
Packaging & service: brite tank, keg, and beyond
A brite tank gives you a stable, carbonated buffer before package. It also polishes haze for lagers and clean ales. Serving “brite” from a dedicated line reduces drift and keeps draft flavor consistent. For small formats, keg workflows should include cold holds, CO₂ breakout checks, and meticulous headspace control.
If you package, match your brite tank volume to filler speed and day targets. A canning day that chases the cellar is stressful; a brite buffer makes the line hum and your crew breathe easier.
Cost & ROI: where the time and money go
Where does your day go? Use this rough split to spot efficiency wins.
Time on a typical turn
- Hot-side (heat-up, mash, run-off, boil, knock-out): ~45–55%
- Cellar (transfer, dry hop, crash): ~25–35%
- Cleaning/Cycle-backs (CIP, hoses, floors): ~15–20%
Simple ROI snapshot
| Lever | Typical Gain | Example Impact |
|---|---|---|
| Faster knock-out (bigger heat exchanger) | 20–30 min saved/turn | +1 extra turn per week |
| Better lauter geometry | 10–15% shorter run-off | Less labor OT |
| Dedicated CIP cart | 25–40% shorter clean | More tank turns/month |
| Smarter glycol zoning | 8–12% energy cut | Utility spend ↓ |
For a microbrewery adding a second shift, shaving 45 minutes per turn across 5 turns/week returns >30 hours/month—enough to absorb new distro orders without hiring immediately.
“We scaled from nano pilot batches to steady 10-bbl production by fixing knock-out and clean-down. Same crew, more beer.” — Operations Lead
Brands & build quality: Blichmann, Anvil, and when to go pro
High-quality home and pilot gear has its place. Blichmann and anvil brewing offer thoughtful features for test batches and homebrewing labs. blichmann engineering’s attention to detail is well-known, and blichmann engineering’s accessories integrate neatly with bench-scale workflows. anvil fixtures are friendly for a compact home brewery or R&D corner.
Once you’re selling pints and pallets, though, you need pro brewing systems with commercial safety factors: thicker jackets, pro-grade valves, bigger drives, and piping designed for frequent hot transfers. That’s the leap from home brewing equipment to plant-floor reliability suitable for commercial beer brewing.
Why choose a turnkey brewing system (and where to learn more)
A turnkey brewing system bundles vessels, piping, controls, and integration so your team can install, commission, and start brewing quickly. If you want one responsible partner for design, FAT/SAT, training, and after-sales, go turnkey and avoid multi-vendor finger-pointing.
Explore these helpful resources to plan your path:
Quick spec table you can adapt
| Component | What to check | Why it matters |
|---|---|---|
| Mash tun | Rakes, jackets, false bottom | Even extraction, faster run-off |
| Kettle | Evap rate, venting, steam stack | Flavor stability, worker comfort |
| Whirlpool | Tangential inlet, cone geometry | Clearer wort, less trub carryover |
| Fermenter | Cone angle, PRV, manway | Yeast harvest, safety, access |
| Unitank | Pressure rating, carb stone | Fewer transfers, flexible scheduling |
| Brite tank | ASME stamp, spray ball | Safe pressure, CIP coverage |
| Heat exchanger | 2-stage, easy pull-apart | Faster knock-out, simpler cleaning |
FAQs
What size brewhouse should I start with?
Start where demand and cash flow meet. Many launch at 7–10 bbl with cellar sized for 2–3 turns/day, then add vessels as SKUs and tap handles grow.
Do I need steam or can I go electric?
Both work. Electric brewing is clean and quiet, great for urban spaces. Steam offers fast ramps and multi-vessel control—ideal for step mash programs.
What’s the difference between a fermenter and a unitank?
A fermenter is for primary fermentation; a unitank is pressure-rated so you can carb and package from the same tank. Unitanks reduce transfers and O₂ risk.
How do I minimize oxygen when transferring?
Purge lines and vessels, use CO₂ blankets, and keep a gentle wort pump curve. If possible, package from a brite tank with DO checks at filler.
How should I plan for packaging?
Match brite volume to line speed and sales cadence. If you’re draft-heavy, invest in keg cleaning and cold storage first.
Is a whirlpool essential?
Yes for most setups. It speeds trub separation and hop stand control, improving clarity and flavor consistency.
Sources & further reading
- Brewers Association: Draught Beer Quality Manual
- Master Brewers Association of the Americas: Sanitation Best Practices
- BYO Magazine: Heat exchanger care and CIP fundamentals
Final takeaways
- Size for demand, not dreams; balance bbl capacity across hot- and cold-side.
- Prioritize clean design: fast CIP, tight sanitation, and easy service access.
- Use unitank flexibility to reduce transfers and oxygen exposure.
- Right utilities—heat exchanger, HLT, and pumps—save time every brew day.
- Choose pro-grade build quality when moving from pilot to production.
- When in doubt, go turnkey to simplify commissioning and support.